close

Sport

Fishing Equipment

Guide to Choosing the Best Crankbait

crankbait

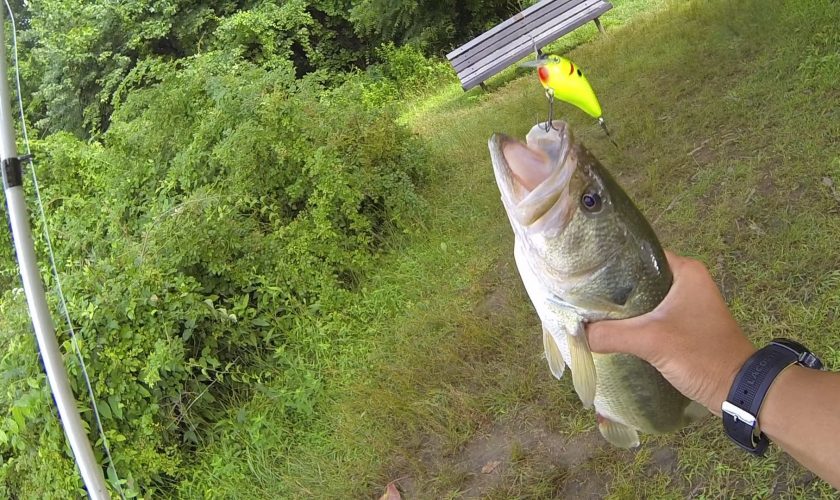
Any fish that routinely eats smaller fish can be targeted with crankbaits. A lure with a plastic lip that causes a bait to dive underwater can be classified as a crankbait. The depth ranges vary from just below the surface down to 20 feet or even deeper.

A crankbait tops the choices of many bass anglers who need a lure to cover water quickly and explore various depth zones.

Today’s crankbaits come in a variety of body shapes and widths, but the lure’s bill is the key feature defining a crankbait as a shallow-, medium- or deep-diving plug.  Crankbaits with square bills are best for running in the shallows from 1 to 4 feet, while a plug with a 1-inch bill will dive to about 10 feet deep.  Crankbaits featuring longer bills have the potential to reach depths down to 30 feet.


Using Crankbait

Crankbaits are one of the most commonly used bass lures. They come in a wide variety of shapes, sizes, and colors, but all crankbaits have a few things in common. First, they have a lip or bill on the front that is designed to plane through the water and get the lure down in the water column. The diving depth of the lure can be roughly determined by the size of the bill: the bigger and longer, the deeper it will dive. Second, there are usually two big treble hooks hanging from the bottom that make it look like it will hang up on the first piece of wood or weed it encounters. While crankbaits often do get fouled in this kind of cover, the attitude or position that the lure travels is bill first and head down, thereby protecting the hooks from snagging.

Crankbaits are relatively simple to fish and can be very effective when used in the right situations. Gene Ellison provides some insights and quick tips into the right situations for using crankbait.


Squarebills and Shallow Divers

The shallowest-diving crankbaits – including the popular squarebill crankbaits – work best around shallow cover. Ideal places to throw shallow crankbaits are around rocks, docks, submerged wood, and shallow grass lines. The key with shallow-diving crankbaits is to fish them with no regard to getting them hung up. While this may seem crazy for a lure that has two treble hooks attached, shallow-divers actually do not hang up often if you reel them in fast enough. When a lure deflects off a hard object, it is often the best time to catch a fish, as it causes a reaction from the fish as the lure changes direction. The body and lip of the crankbait will absorb the impact, causing the deflection, and the hooks will rarely penetrate the cover at high speeds.


Medium Divers

Medium-diving crankbaits work well in water that is shallower than 10 feet, even when they dive deeper than the water’s depth. A crankbait that dives 10 feet, for example, will be excellent in shallower water, as it will dig into the bottom and cause a disturbance. Like shallow-diving crankbaits, a deflection also triggers strikes, and a short pause after a deflection often results in a strike.


Deep Divers

A deep crankbait works well for fishing off shore structures like rock piles, creek channels, and ledges. It takes more effort to get these crankbaits down deep and to make them stay there. Like the shallower styles, bottom contact is important, and any deflection or change in the retrieve will trigger a bite.


Line Type, Size, and Diameter

Selecting fishing line is one of the most overlooked aspects of crankbait fishing. Line size and diameter greatly affect how deep your baits will dive and what action they will have. Simply put, the thinner the diameter is, the deeper a bait will dive.

In addition to the line diameter, the type of line will affect the diving depths of your crankbaits. Monofilament and braid will float, and fluorocarbon will sink. Braided line will also have the least stretch, making it the least attractive option for crankbait fishing. The lack of stretch will tend to pull hooks out of the mouth of a fish, resulting in more lost fish.

Monofilament and fluorocarbon are the top choices for crankbaits. Monofilament is ideal for shallow crankbaits, especially when you are fishing around grass, as it will not hang up as often as the sinking fluorocarbon.

Fluorocarbon is a great all-around line for crankbait fishing; it has minimal stretch, and the sinking properties will allow a crankbait to dive deeper.


5 Common Crankbait Fishing Mistakes

Crankbait fishing is a lot more than just mindlessly reeling a lure, however. There are several important caveats that, when considered, will take your cranking game to a whole new level.


Robot mode

As much as we’d love to experience hot and heavy action each time we hit the water, it’s simply not practical. Regardless of your preferred technique, you’ll often fish for hours without a single bite. This lack of action can create a bad habit for crankbait fishermen.

Crankbait fishing is all about making the fish react, which often means making your lure do something different or erratic. Pay close attention the next time you see a school of shallow baitfish—they rarely swim in a straight line. They’re extremely fidgety and every few seconds they’ll dart or dash to the side.


Fishing too quickly

There’s no doubt that crankbaits are an effective tool for quickly covering large expanses of water. They allow for long casts, quick retrieves and they spend a lot of time in the optimal strike zone.

But that doesn’t mean you shouldn’t thoroughly saturate a key piece of cover.

I’d say that 99 percent of my crankbait catches over 5 pounds have come after several identical casts to the same piece of cover. I started keying in on this several years ago and since then, I’ve enjoyed a lot of success whether I’m tournament fishing, guiding or fun fishing.

I’m no biologist, but here’s what I think it comes down to: The biggest bass on a body of water are both smart and lazy. I don’t think most people catch big bass because they find some magic honey hole. In my personal experience, most of it comes down to ticking them off and making those suckers bite.


Improper rod angles

When most of us started fishing, we were tought to set the hook with an upward motion. It’s just the most natural feeling and for most bass fishing techniques, it works just fine. But when you’re crankbait fishing, you should never set the hook upward.

Proper hookset mechanics begin with the appropriate rod angle throughout your retrieve. Not only will it increase sensitivity, but you’ll also be in prime position when it comes time to set the hook.


Using a rod that’s too stiff

If any bass fishing technique calls for a specialty rod in your collection, it’s crankbait fishing. I see so many people who have perfect mechanics constantly lose crankbait fish. It’s honestly not their fault—it’s the rod’s fault.

I like to use a pretty wimpy rod for crankbait fishing. For shallow-running flat-sides up to 1.5-size crankbaits, I like to use a 7-foot medium-action rod. It doesn’t have much backbone, but its tip is what I’m most concerned with.


Squarebills aren’t a cure-all to snags

There’s a lot to be said for squarebill crankbaits; they’re essentially the four-wheel drive of reaction lures. Their lips are designed to allow them to glance off of hard cover while protecting the hooks, thus reducing annoying hang-ups.

But let me be very clear: You can’t just smash ‘em into cover and expect them to make it through unscathed. They’re not the magic pill that will end all snags. It takes some work on our part to maximize their effectiveness.

read more
Fishing Equipment

Baitcasting Reels Buying Considerations and Tips

baitcaster_reel

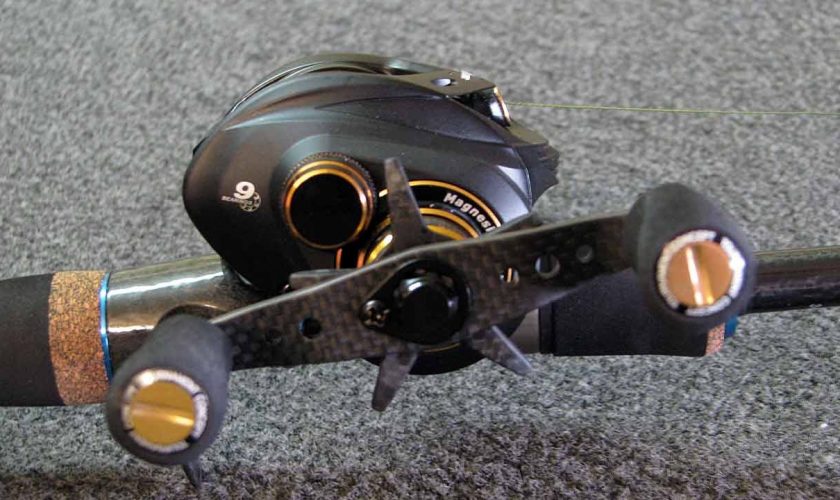
Baitcaster reels are a purpose built reel with plenty of features to suit every persons fishing style. Designed ultimately for lure casting or trolling and either being of low profile or barrel style to suit the individual user’s needs. They are very accurate for casting lures at structure and can be controlled easily with one hand. One of the best features to any baitcaster reel is the magnetic cast control which can be altered depending on the weight of the lure and the user’s ability.

For barra fishing and bass fishing and many other salt and freshwater species, when it comes to precision casting with a wide variety of lure weights, shapes and sizes, baitcaster reels are the way to go — and Shimano have the best in the business.

For decades now, a skilled baitcaster user who can land a lure just millimetres out from a snag has been a fishing opponent to be reckoned with. Now, while threadline proponents might disagree, a crack-shot with a baitcaster usually finds a lot of fish on the end of his line by the end of the day. And whether you hook a fish or not, there’s a lot of satisfaction to be derived from uncorking a bottler of a cast, whether you make use of cast assisting features such as Shimano’s Variable Braking System (VBS) or go it alone with the much revered ‘educated thumb’.

Shimano’s low profile baitcaster reels are ergonomically designed to be comfortable to use for long periods of time, as casting accuracy can really suffer when arms and wrists become tired, especially in the tropical heat, but when that long-awaited hookup does occur, other Shimano-exclusive features such as ultra smooth drags, SA-RB or A-RB bearings and Super Stopper come into play to make the fight even more enjoyable.

For mixed fishing situations such as live baiting and trolling — whether hand-held or sitting the outfit in a rod holder — traditional round cross-section baitcasters still hold sway, especially when line capacity is a factor if targeting species such as Niugini black bass, big saltwater barra and offshore dwellers such as Spanish mackerel and black jew.


Advantages of Baitcasting Reels

We believe anglers should use both spinning reels and baitcasting reels to be the most versatile angler you possible. However, there are many techniques and lures that are best used with a baitcasting combo.


Heavier Line

On a baitcasting reel, the spool’s axis of rotation is perpendicular to the rod guides, meaning the line comes off directly through the line guide and straight through the rod guides. This makes it easier to use heavier lines, from 10-20lb test on average, and heavier lures. A good baitcasting setup can easily cast lures from 1/4 to 1oz, and more.


More Power

Baitcasters are capable of more power than spinning reels, thanks to their spool layout and design. The spool is in-line with the handle and gears so the reel can apply more power and torque. Also, because the handles are mounted directly onto the reel frame there is no lever arm to cause flex when reeling hard on a fish.

More Control

Baitcasting reel combos give you a higher degree of casting control compared to spinning gear because you can control the distance and speed of your lure by thumbing the spool during the cast. Once you become proficient in their use, you can achieve pinpoint accuracy with your casts, allowing you to place your lure exactly where the fish are.

Baitcasting reels are ideal when using heavier line and lures, and they provide greater control over the speed and distance of casts. You’ll find a great selection of baitcaster reels at Field & Stream. Choose from the best brands, including Abu Garcia®, Daiwa®, Lew’s®, Quantum®, Shimano® and many more.

Find the perfect match for your new reel in our great selection of casting rods, or try a baitcasting combo.


Buying Considerations

There are several factors to consider before investing in a baitcasting reel, including:


Frame

Most baitcasting reels feature an aluminum or graphite frame. Graphite is lightweight and easy to handle, while aluminum is extremely durable. Top-of-the-line reels often feature a one-piece aluminum frame.


Design

Low-Profile Baitcasting Reels: Low-profile models are the most popular type of baitcasting reels; they feature an ergonomic design and are perfect for bass and crappie fishing.

Round Baitcasting Reels: Round baitcasters are workhorses—they hold more line than low-profile reels and are great when using large baits and heavy line.


Gear Ratio

Gear ratio indicates the speed and power of your reel. For example, for a reel with a gear ratio of 6.4:1, the spool spins 6.4 times for every one crank of the handle. A gear with a lower ratio, like 4.1:1, will provide more cranking power, while a ratio like 7.1:1 indicates a very fast retrieve


Bearings

Generally, more bearings mean better performance, but pay attention to the bearing quality. You’ll be better off with four high-quality bearings as opposed to 10 lower-quality ones.

Baitcasting reels can be tricky to master. If you don’t stop the spool from spinning before your lure hits the water, you’re likely to face a bird’s nest—a nasty tangle of fishing line that can make for a frustrating day on the water. Many beginners prefer spinning reels over baitcasters because they are more forgiving, and easy-to-use spincast reels may be the best option for children. One key to avoiding a tangle: make sure you don’t release the line too late

read more
Hunting Tips

Turkey Hunting Tips – A Guide for Hunting Turkey

turkey_hunting

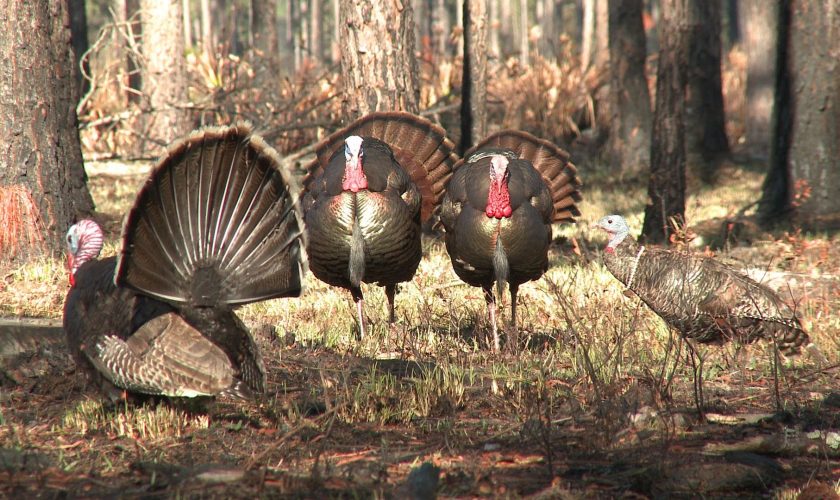
Think of this as your ultimate spring turkey hunting guide. We’ve compiled pages of tips and advice explaining the basics, and then spiced it all up with numerous links to in-depth videos and articles that’ll benefit first-time hunters and Grand Slam holders alike. The end goal is simple: to teach you how to hunt turkeys more effectively.

How to Find Gobblers

Pre-season scouting and during hunts is an ongoing strategy. New turkeys may arrive from other locations during the spring dispersal. Daily movements of resident birds may change. Often turkeys use the same inviting habitat annually for what it offers them — namely roosting cover, seasonal food sources and spring breeding/nesting areas. That’s where you’ll find birds.

Turkeys also leave a mess wherever they go – a bonus for hunters. Droppings, molted feathers, scratchings in leaves where they’ve uncovered food, tracks in mud or dirt, dusting areas where they’ve rolled in loose soil, and even wing drag marks from strutting, can clue you in to their presence. Putting this puzzle together gets you closer to tagging one.


Roosting

By far the easiest way to kill a gobbler in the spring is finding his roost the night before. Use your pre-season scouting observations to key in on a general area where the turkey might be spending the night. When you get off work, hop in the Bad Boy Buggy and head to the woods. Without spooking the bird get within earshot, and listen for wings flapping and light calling as turkeys fly up on their roosts for the night. You can also use an owl or crow locator call to get a tom to gobble on the roost as its just turning dark. “Since there’s no leaves on the trees… you can cover ground at dark and see them in the trees and hear where they’re roosting”-Nick Mundt. By getting in close to observe and listen to a tom on the roost you will know exactly when and where to be the next morning.

Wake up early and walk in the cover of darkness, not using a light, and set up close to the tree. Call to the tom lightly after he begins to talk on the roost. If you let him know there is a hen below in your direction he will come and investigate. If you are not the best at the “turkey talk” there is still hope with this tactic. “ Roost the gobbler in the afternoon but the next morning concentrate on finding the hen group closest to that roost, place yourself between the tom and the hen group and be patient, he will come” –Nick Mundt.


Find the Water

While this truth might not be as applicable in portions of the Southern and Eastern U.S., it’s certainly true in Texas, Oklahoma, the Great Plains and the Western U.S. where water sources are at a premium. And even back East and down South, as the springtime season heats up, turkeys will often find their way to water, be it a pond, a stream, a river or even a lakeside shoreline. The scarcer water is on the property that you are hunting – especially during periods of drought – the more likely it is that a longbeard will come in to slake his thirst at some point. If you’re hanging around the area, he might sound off with a gobble, putting you suddenly in business.


Late Season Hunting Tips

Late season turkey hunting comes faster than most would like — especially if you have yet to kill a gobbler.

Depending on where you turkey hunt south to north, some hens will likely be nesting during the late season. A few poults may have even hatched. Younger hens might still be with gobblers as their breeding activity begins later and finishes sooner than older female turkeys. Hens running with gobblers may still continue to challenge you as they did in the early season.

Find a gobbler or gobblers without hens, as these male turkeys still look to breed, and you could have a memorable hunt. Eager gobblers sometimes commit to calling better in the late season than at any other time of year.

Another seasonal transition will challenge you next: gobblers searching for other gobblers.

Say what? As spring becomes summer, hens nest and hatch broods, and gobblers reform male-only groups. They stay with this flock through summer into fall. If the spring turkey season is still open, calling like another gobbler might bring the bird you want into range.

But your calling tactics will change. Early in the season you imitated hen clucks and yelps to interest gobblers that wanted to breed. Now in the late season, gobbler yelps and even gobbling can be more productive.


How to Call In A Turkey

You’ve found a place to hunt. You’ve done your scouting. Now it’s time to think about potential turkey hunting setups. Choose a spot as close as possible to the gobbler you want to kill, but without spooking the bird. It should be along a fairly predictable travel route. Calling in a turkey is much easier when you’re sitting where he wants to go anyhow.

Before you sit down, look around first to make sure you have open shooting lanes for when the gobbler comes in. If possible, use the terrain to find a location where, as soon as the turkey steps into view, he’s also in range. This might be the edge of a ridge top or pasture corner trail. If possible, sit with your back against a broad-trunked tree facing this spot. Put your seat cushion there. Get ready, placing calls nearby.


If you’ve roosted turkeys, make your early morning setup near where birds fly down, which is often an open area. A decoy or two might help them come to your calls. If you’ve patterned field birds and found strut zones, make your setup there. Portable blinds also work well in such situations.

Turkey hunting setups will change as spring gobblers (and the hens they follow) move through the hunting day. You can sit, call and passively wait on birds to come to you. You can also go to the turkeys and close the distance with your next setup. Many turkey hunters do a little of both.

Eventually you’ll find yourself sitting at your setup with the gobbler hunting down your position. That’s when you’ll know you’ve picked the right spot at the right time. There’s no thrill like it.


Turkey Calling Sounds You Must Learn

When looking for flock mates, or other lone hens and gobblers, turkeys call. It’s an effort to get another bird to call back, step into view and reveal its exact location. It’s basically a wild turkey asking, “Where are you?” or saying, “Come over here where I am.” By imitating those sounds, you can call turkeys right to you.

While roughly 30 turkey calling sounds can be heard in the wild, fewer than half of those vocalizations are usually used while hunting. Many spring gobbler hunters make just two basic calls: the plain cluck and hen yelp. Those two calls kill plenty of turkeys. But other good sounds to learn include roost clucks and tree yelps (a.k.a. “tree calling”); fly-down cackles; cutting (loud and fast clucks); lost yelps; purrs; gobbles and even the kee-kee sounds of young birds.

A cluck is the single-note sound made frequently throughout the day by both gobblers and hens. Clucks are often spaced out, with two or three seconds between notes. And sometimes the bird might just cluck once.

The plain hen yelp is usually three to eight notes long, and it’s the calling option most often employed by spring turkey hunters to lure gobblers to setups. Hen yelping is higher-pitched than the deeper, coarser yelping of gobblers. Tom turkeys yelp with a slower cadence as well, and yelps are generally fewer in number — often three notes: yawp, yawp, yawp. In the spring, a jake will often yelp, rather than gobble, on the approach, so it’s an important sound to recognize.


Decoys

Pairing the calls up with the real thing or at least make them think it is by using a decoy is how you bring a tom (or a lot of them) into range. What turkey decoy type should you use?

“A lot of times if you’re using a Jake decoy, a turkey will strut in with slow movements, he’s not really jumpy. I think when you use a stutter decoy, sometimes those turkeys come in and they’re on edge…shying away from the gobbler. So sometimes the Jake in the pre-breeding position is the one to use. I also like to take a set of wings from a turkey and zip tie them to the side of a decoy. It gives it a little more dimension and realism. It gives you a good bit of cover when you want to crawl in on some turkeys that are in a field”– Nick Mundt.

While stutters and Jake decoys might result in a shy uncooperative bird, you can never really go wrong with a single hen decoy.

read more
Hunting Tips

Coyote Hunting Tips – A Guide for Hunting Coyote

coyote_hunting_tips

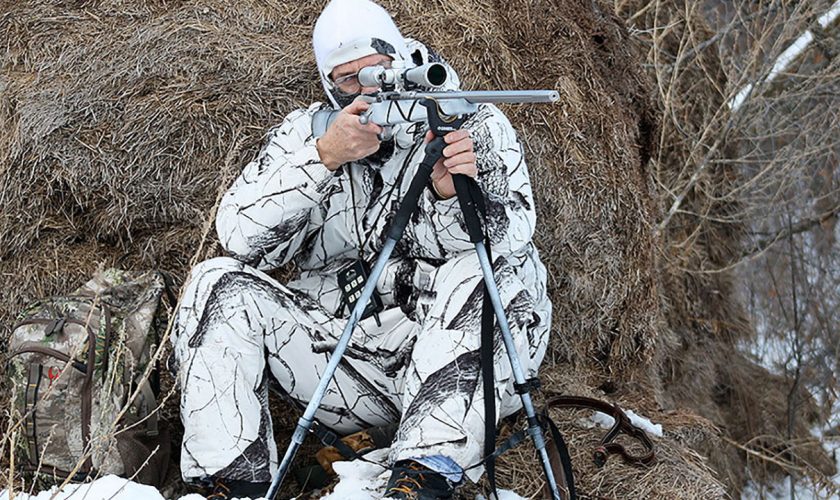
Fool one of these superwary predators and you earn the rank of expert hunter. Here’s how to do it:

Focus on areas that hold small game, birds, mice, and vermin. CRP fields, brushy creek- or riverbottoms, swamps and marshes, and young clear-cuts are all excellent choices. Most farmers will gladly give you permission to hunt. Pinpoint your spots by looking for tracks and listening for barks, yips, and howls at dawn and dusk. The ideal conditions for a hunt are cold, calm days. Windy days are the worst.

Stealth is the first priority: no slamming vehicle doors or talking to your partner. Settle into a comfortable shooting position on a knoll or field edge that offers good visibility, and wait five to 15 minutes before calling.

Coyotes have extremely keen eyesight and, like any animal coming to a call, are looking hard for its source. Make sure your camo is good and that your hands and face are covered. A cushion to sit on helps you keep still.


Coyote Hunting Gear

You don’t need much to start, and you may already have it:

CALLS Mouth-operated rabbit squealers are a must, but don’t rely on them alone. Also use other distress calls and coyote howlers.

DECOYS These act as a closer to your calls. One of your kid’s beat-up stuffed animals can suffice, though battery-run motion dekes work best.

GUNS Flat-shooting rifles in .223 caliber work best in open terrain, but your deer rifle will do the trick. Shot-guns rule in thick timber or on night hunts (where legal). If you hunt turkeys, you probably already own the right setup: a tight-choked 12-gauge that throws a dense pattern out to 35 yards. Use No. 4 buckshot in magnum loads.


Tips for Calling in More Coyotes

Practice What You Preach

Electronic calls are great. So are hand calls. But neither will come easy to you. They take practice.

“If you’re hand calling, get out and do it,” Belding said. “The best teacher is doing it yourself and failing. If something doesn’t work, try something a little different. Then you’ll know what works for you in your area. It’s different depending on terrain, prey, and other factors.”

Walk Into The Wind

Coyotes have exceptional noses. They’re canines. And canines are infamous for their ability to sniff things out, including people. That has to not only be considered but also dwelled upon in order to be consistently successful.

“Keep the wind in your face,” South said. “You can’t call a coyote that knows you’re there.”


Pick A Vantage Point

“Pick a vantage point where you can see the coyote when it responds to your call,” South said.

You can’t kill something you can’t see. The only way to make sure you see approaching coyotes is to get somewhere you can. Get up high on a hill, or somewhere else where you can see the landscape around you. The last thing you want is a coyote sneaking within a few yards of you and not even realize it’s there.


From Stand To Stand

Give each stand 20 to 30 minutes to produce. Most times, coyotes will respond within the first five minutes. But that isn’t always the case. Give each stand time to work.

“Typically, in our neck of the woods (Reno, Nevada), we go ¾ of a mile to a mile between calling setups,” Belding said. “But on windy days—working into the wind so they don’t smell you—you can set up more frequently and get close to them. They can’t hear you coming. You can use this to your advantage.”

For those hunting in the eastern states, you also can set up a little more frequently. Rolling hills, dense cover and other factors prevent sounds—and calls—from traveling quite as far. That’s something to consider when choosing stand locations.

Mistakes Rookie Coyote Hunters Make

No matter how many times you watch the coyote-killing team on video, you just can’t figure out how to duplicate their success. While those guys seem to bring coyotes running to the gun every time they make a rabbit squeal, you’ve only managed to call in a few crows and one stray dog looking for an easy meal. You’ve spent a few months’ worth of rent on rifles, lights and calls. You’re developing tinnitus from listening to the scream of a dying rabbit over and over. And, still, you haven’t gotten a single ‘yote to show for your efforts.


You’re Hunting Where There Are No Coyotes

You might be surprised at how often this happens.

Unlike deer hunters who scout for months in search of a big buck, coyote hunters have a tendency to say, “They should be here” and set up in an area where there may or may not be many coyotes.

Hunting in an area that is nearly void of coyotes is a big waste of time and energy. Scouting helps you to avoid that trap. Look for tracks, kill sites and scat, and it’s not a bad idea to pay attention to coyote vocalizations to determine where they call home. It’s well worth a few hours of your time to greatly up the odds of success when you’re hunting. Once you do find an area with coyotes, don’t run them all off with a sloppy approach to your calling setup.


You’re Using the Wrong Call

Coyotes don’t just come running any time they hear something that sounds like a dinner bell.

“With all the coyote hunters out there it’s hard to find a mature dog that hasn’t been called to,” says Realtree pro-staffer and predator hunting expert Fred Eichler. “Many are educated and often turn tail and run when they hear the common sounds used by most coyote hunters. By using the calls coyotes haven’t heard, or that aren’t commonly used, a new caller will have more success. I often use bird calls like a turkey in distress or woodpecker distress or I use fawn bleats or puppy screams to bring in call-shy dogs.”

For newcomers, coyote hunting guru Mark Zepp recommends an electronic caller.

“The reliability of today’s electronic calls make it easy for anyone to go out and give it a try without worrying whether or not they are making a correct sound with a hand call,” he says.


You’re Calling Too Much or Too Little

This is an area of great debate among serious coyote hunters. Calling too much can warn off a curious coyote, but calling too little or too softly may not entice a distant coyote to break cover.

As a general rule, open areas require louder, longer calling sequences. But be careful. A loud, long string of calls may scare away incoming coyotes in high-pressure areas.

This is one of those mistakes that only experience can remedy. Keep notes on how you call in certain areas and what the outcomes were. Over time, you’ll start to identify patterns that worked. And ones that didn’t.


You’re Giving Up Too Soon

A common mistake, according to Eichler, is giving up on a set too soon.

“Whether I am calling in Florida or Canada I sit a minimum of 30 minutes,” he says. “The only exception is if it’s snowing, raining or really windy and I know the call isn’t carrying as far. On a calm day or with a 10-mile-per hour wind or less, I have a lot of coyotes come in after 20 minutes. A lot of newbies are packing it up by then.”

Give your calling location enough time to work. A good rule of thumb is to wait 30 minutes before moving on.


You’re Hunting Pressured Dogs

So let’s wrap this up. Hard-hunted coyotes are smart coyotes. Why? Because the dumb ones are already dead.

If you’re a newcomer and have spent some time calling, odds are good you’ve made one of the mistakes listed above and educated coyotes. But don’t worry too much about that — even if you didn’t, odds are good someone else did.

Coyotoes living in heavily-hunted areas are harder to hunt. That’s just the way it is. But by following the advice you’ve just been given and doing what you can to hunt smart, you can turn the tide.

Heavily-hunted coyotes aren’t going to fall for the same song and dance that every other hunter in the woods is throwing their way. Be innovative. Try different calls, keep it subtle and keep it smart.

read more
Hunting Tips

Deer Hunting Tips and Guide from Experts for Beginners

deer_hunting

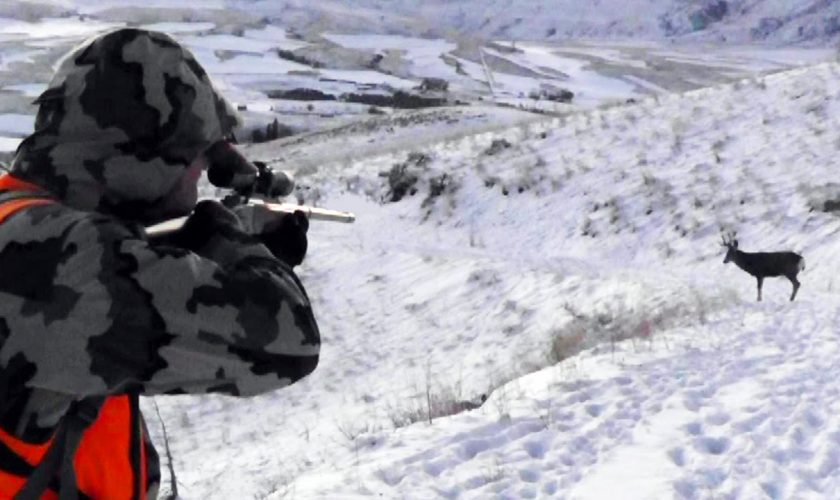
On a crowded public area, that may be true. But in most cases, you shouldn’t be so quick to write off a mature buck that you bump just once. Handle things right and you could get a second chance.

First, consider what happened. How spooked is the buck? A whitetail that just vaguely notices movement or scents you isn’t likely to permanently leave the area or become “unhuntable.” On the other hand, a buck that has three senses alerted—scent, sight, and hearing—is much tougher to get a second crack at. But the situation isn’t hopeless.

How thick was the cover? Deer in open areas may run a half mile. In dense cover a buck might only bound 150 yards and hunker down. Analyze exactly where the buck was and what he was doing. Was he traveling, feeding, hooked up with a doe, bedded in thick cover, pushed out by a drive?

Make a List and Use a Tote

You cleaned your gun, bow and other gear and put it away after last year’s hunt, but do you know where everything is? I store my deer gear — ammo, hand warmers, drag rope, safety harness, field-dressing gloves, knife and other essentials — in a plastic tote during the off-season.

I like to think I am organized, but sometimes a key piece of equipment finds its way out of the tote, and by the time the season rolls around I have no idea where it went.

That’s why I keep a ‘deer hunter’s’ checklist with my stuff.

A simple checklist will help you round up stray gear and replace anything that got lost or broken or just plain wore out. Check off items as you put them in the tote and keep the list inside the tote.

When gun hunting season rolls around, use the list to pack for your hunt and you’ll never again find yourself in a frantic search for your ammo or knife just before dawn on opening morning.

Pinpoint the Pinch Points

Not long after first light—when the guns get to cracking—deer will be seriously on the move. They’ll do it quickly and efficiently. That means they’re going to follow the path of least resistance, so pinch points and funnels located in cover can be dynamite on opening day.

How to Hunt It: Locate your stand downwind of a prime terrain feature that will focus deer movement. Pack a lunch and stay put. When the pressure is on, you could see a shooter buck at any time of the day, either moving naturally (especially if the rut is on) or as a result of being bumped by neighboring hunters. Stay alert.


Be Attractive

You heard that right.

Using deer attractants is another strategy that veteran hunters have been using to maximize their hunting success.

Fortunately, the market has all kinds of deer attractants; ranging from deer feed, deer urine, deer feeders, and so much more.

These enable you to attract the deer to your stand for easy take-down.

A great example where the deer attractants have been proven to work is the use of the drag rag soaked in the doe estrus in the peak-rut season.

Often, bucks will follow these trails right to your waiting stand!


Get Lost

It’s an old adage, but sometimes you have to hunt where no one else is willing to go. A recent Penn State study of radio-­collared deer showed that whitetails change their patterns almost immediately on the day before the general firearms season opener due to increased human traffic.

How to Hunt It: Go for broke and hunt an out-of-the-way location few others would consider. Small, obscure pockets of cover produce some of the biggest bucks each season. They may not look like much, but they are overlooked sanctuaries. A small ditch, a tiny ravine, a patch of grass in the middle of an open field. Hide and sit out the day.


Let the Weather Be Your Guide

Food-source abundance, hunting pressure, the influence of the rut, and the moon will all affect the action on opening day. Nothing, however, will impact the timing of when you’ll see that action more than the weather. Most of us are deer-season weather watchers, but you’d better pull your best Al Roker if you want to get it exactly right.


High Pressure

What to look out for: A whirling mass of cool, dry air that generally brings fair weather and light winds.

How to Hunt It: This is what everyone plans for—seasonable temperatures, little to no wind, sunny days, clear nights. When the forecast calls for a stationary high-pressure influence, park your butt on stand or in a blind and sit it out.

The Wildcard Tactic: If temperatures are subfreezing, hold off switching locations until after the sun has melted the morning’s frost.


Heavy Wind

What to Look out For: Wind speeds over 20 mph. Know that there’s much more to whitetail hunting as it relates to wind than simply trying to stay downwind of a buck. Essentially, there are two different key factors to heed: wind direction and speed.

How to Hunt It: The stronger the wind speed, the quicker the barometric pressure will rise, and the time to be out is after it subsides—especially if the wind changes from east to west.

The Wildcard Tactic: This can be prime time to still-hunt or plan a drive.


Rain

What to Look out For: The lilting sound of droplets hitting the roof of deer camp. Rain on opening morning means more to hunters than it does to the deer. Precipitation will do little to slow down deer movement.

How to Hunt It: Grab your raingear. Bucks can neither hear you nor smell you. It’s a great time to go for a serious still-hunt.

The Wildcard Tactic: Wait out a deluge in a covered blind or watch the radar back at camp. When the tailing edge is an hour away, hit the woods.


Snow

What to Look out For: Your local weather forecaster predicting a snowmageddon.

How to Hunt It: Whether it’s a heavy snowfall or just flurries, snow makes deer hunting easier. Unless there’s a raging wind, you’ll be able to see animals better and, as with rain, they won’t be able to hear or smell you as well. Sit in a stand if you prefer, but snow is made for tracking. The Wildcard Tactic: The two hours prior to and the two hours just after are the absolute best times to hunt a snowstorm.


Heat

What to Look out For: Daytime highs above 70 degrees.

How to Hunt It: Whether it’s opening day or the peak of the rut, you’d almost be better off rescheduling—but, of course, you can’t. Whatever you do, don’t miss first and last light.

The Wildcard Tactic: Post in a stand near a water hole.


Talk the Talk

Deer are vocal animals, and many hunters use grunt calls to attract or stop a buck. Other deer vocalizations can work, too. A loud “B-l-a-a-a-t” will sometimes stop a running deer long enough for a shot.

A wheeze will sometimes confuse a deer that is wheezing at you but hasn’t winded you yet. A grunt will sometimes turn a deer that has walked past you or bring it out of cover for a clear shot.

You can buy calls that make all three sounds and more, but with a little practice you can learn to make them with you mouth, which keeps both hands free for safer gun handling and accurate shooting.

read more
Hunting Tips

Duck Hunting Tips and Guides from Expert for Beginners

duck_hunting

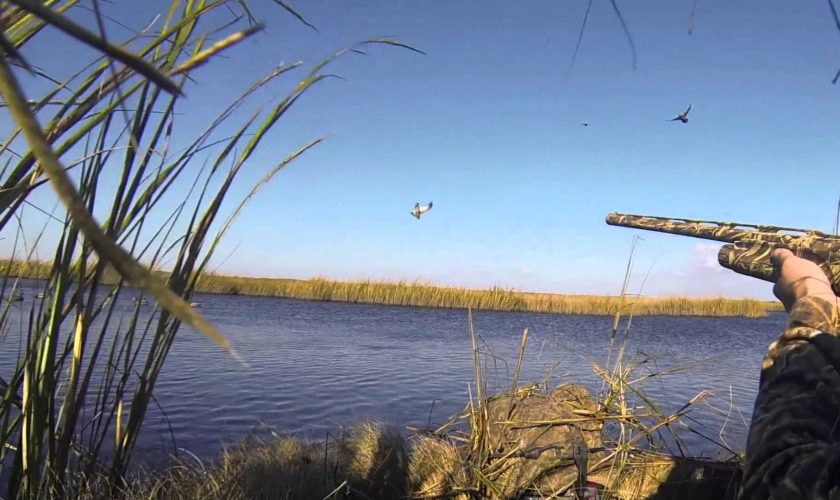
So you’re interested in duck hunting, but you have no idea where to start. This is a common problem. Now that the majority of us don’t have to hunt to live, it’s not really a skill that’s widely possessed. Still, there is something about hunting that brings us back to our roots, back to the earth, any it’s an itch that many people want to scratch – even if it’s not a necessity. This article sets out to get you familiarized with the basics on how to start duck hunting so you can get out there and enjoy one of the world’s favourite outdoor past times.


Camo Cord

Nothing beats natural vegetation for concealment in duck hunting. To hold natural camouflage materials on my duck boat, I use stretch cord that I purchased at a kayak supply store. Line the sides, bow, and stern of the boat with sections of cord spaced about a foot apart and secure them in place with four-penny nails, screws, or pop rivets. Next, weave vegetation such as cattails, bulrushes, or cornstalks between the cords to conceal the outline of the boat. If woven carefully, this material will remain in place throughout the season.


Match Your Decoys to The Ducks

Many hunters use mallard decoys all the time. Mallards are easiest to find and often the cheapest. And, hunters figure that when playing the percentages, mallards are never wrong. But day in and out, do you see more mallards or other species? Ducks have great eyesight, so a spread of all mallards when no mallards are around looks fake. If you’re hunting wood ducks and teal early in the season, and then gadwalls, pintails, black ducks and other species later on, invest in decoys to mimic those. Don’t be afraid to make mallards the minority in your spread.


Stay Late

Waterfowl frequently migrate with or slightly behind cold fronts to take advantage of strong tail winds. On good migration days, don’t leave the blind early. The best hunting often occurs late in the morning, when many migrating flocks stop to take a rest.


Calm Approach

Nothing spooks late-season ducks more than stationary decoys sitting in an open hole. On calm days I throw most of my decoys back in thick brushy cover and rely on calling to bring in the ducks. Circling birds only catch brief glimpses of my decoys while they’re working, and, by the time they get close enough to get a good look, it’s too late.


Patience Pays

A common mistake made by many waterfowlers is to flush large numbers of ducks off a roost in the dark before dawn. If left alone, these birds will often fly out to feed at first light and then filter back to the roost later in the morning. Rather than spooking the birds in the dark, wait until sunrise or later before going in and setting up. Although you might miss out on some early shooting, you may have a better hunt overall as the birds will provide more shooting opportunities as they return in smaller groups throughout the morning.

Multiply with mud hens

Another old trick is to hunt a marsh at low tide and flip a shovelful of mud onto an existing mud mound or in a very shallow spot to make it look like a duck floating among a scattering of real decoys. Derwort says mud hens or mud ducks are a cheap way to make it look like there are more bodies in your spread than you’ve actually put out.


Ratchet it up

One of the best pieces of waterfowling gear to carry along with your calls and shells is a pair of ratchet cutters. Whether your blind needs a quick spruce up just before legal shooting light or the ducks prefer landing in another part of the lake and a move is in order, cutters allow you to quickly and quietly snip limbs up to a half inch thick that can be used to brush-in a favored spot or set up an impromptu blind along an open bank where the ducks are waiting to land.


Assign Shooting Positions If You Are the Pit Boss

All blindmates seem to have the “shot caller” assignment ingrained. The duly appointed, usually the lead caller, counts down the landing and decisively—with supreme timing—barks the heralded command. Occasionally, this role becomes fluid when the non-appointed has a better vantage point.

Nonetheless, the primary goal is to give everyone a chance at the decoying flock. So, why does a single fat greenhead consistently draw the attention of more than one barrel? Chances are he was the sure bet and no one assigned fields of fire. Outer shooters should work from their edges inward, while the center shooters receive high-low assignments. Considerable work goes into landing waterfowl and your success not only depends on a seasoned shot caller, but also on each hunter shooting their position. The objective is efficient gunning, not concentrated fire on a couple birds. Next time you touch the trigger, your banded drake may still be available without controversy.


Do What Works For You

I’ve got a buddy who always uses a half-dozen spinning wing decoys in his spread. Many times, I won’t use any. The way we hunt is simply different. His objective is to attract as many ducks as possible to his area. My spread often attracts fewer birds, but allows me to decoy those that do come in. In any case, both of our systems often result in good hunts. As you develop your own system, it’s far better to learn from what you’ve experienced and found in your personal hunts than to take recommendations from others. Personal experience is more powerful than boat ramp chatter or Internet forum information.

read more
Hunting Equipment

Hunting Gear List – Find the Right Hunting Gear for You

hunting_gear

We learn lessons in the outdoors that simply cannot be mastered from the desk or the couch. Hiking a boundless hillside, panting with each breath, teaches us patience. Hours of target practice, hoping the tangerine-tinted clay shatters into fragments each time we sight it, teaches us diligence. And hunting alongside a well-trained working dog teaches us gratitude. Here at Orvis we are as passionate about learning these lessons ourselves as we are about sharing them. We hope to inspire, as we are inspired by everyone in the field. Hunting is a heritage lifestyle… spending time in the field is more important than time in the boardroom. Become part of the tradition.

Choosing the right equipment for hunting predators is pretty critical to your success. I’ve tried to take out some of the thinking for you by my experiences through trial and error. I still recommend that you test out different accessories and products so you create your own comfortable way of hunting. I have used or currently use all of the products on this list of varmint hunting supplies.

Our collection of hunting and shooting gear has everything you need for a successful day in the field or on the range. Find lightweight, breathable and durable hunting jackets designed to perform even in the harshest weather conditions. If heavy duty brush pants are what you need, our Sharptail hunting pants will protect you from even the toughest thorns. The Mesh-Backed Clay Shooting Vest is one of our most popular vests and it’s no wonder why. With articulated shoulders and a meshed back this vest delivers maximum mobility, comfort and breathability. Keep your feet dry and comfortable with our selection of lightweight, durable and waterproof hunting boots. Select from a wide range of high-quality and reliable hunting knives including fixed blade, folding and collectible knives. Protecting your eyes and ears is absolutely critical. From digital hearing protection to high-impact shooting glasses we have the safety accessories you need to protect your most valuable assets. Eliminate clutter and stay better organized with our premium field bags and luggage. Our Waterfowl Pit Bag is the perfect choice for carrying, separating and organizing your waterfowl essentials. Tired of not having a good place to put your wet and muddy waterfowl waders? Our innovative Max 4 Wader bag solves that problem. Explore our full line of hunting and shooting gear and find exactly what you need for your next adventure.

You need the right gear to be deadly on the hunt.

Turn to the hunting equipment and hunting apparel that experienced hunters trust. From guns and hunting knives to breakthrough hunting optics and hunting apparel, pack up right for the field.

Stake out prey with treestands or blinds-be ready in any terrain with ladder stands, hang-on stands and hunting blinds that help cover you from all types of game. Step out in hunting boots that deliver sure-footed traction and warmth.

Rule the course with paintball guns and airsoft guns. Keep your vehicle clean and new with camo seat covers. Field dress your game with hunting knives and multi-tools. From big game to varmint, find what you need from brands like Nikon®, Bear Archery® & Field & Stream®.

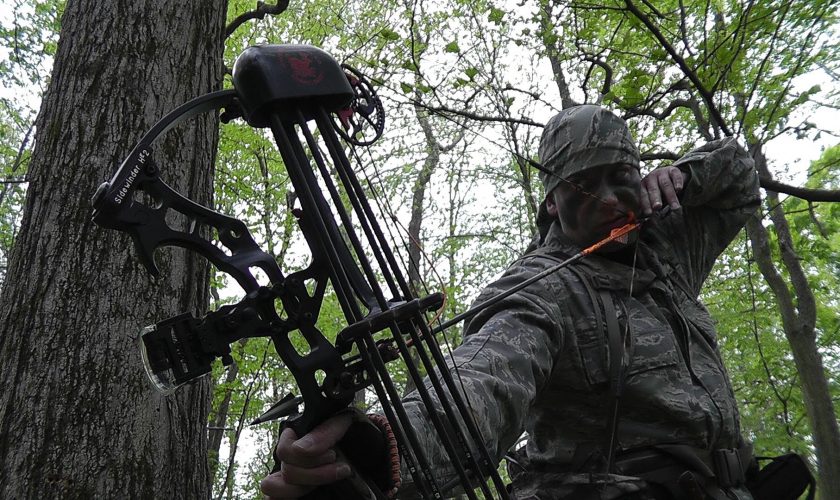
Stalk down your prey with industry-leading archery equipment and shooting equipment. Skilled and novice archers get the right blend of strength and pin-point accuracy with precision-engineered compound bows and crossbows. Look for a light stock and a low-profile feel.

Gain the advantage with rifle scopes, binoculars and rangefinders that deliver on any terrain. And find the hunting knife that’s right for the job. Shop knives crafted for field dressing, machetes for slicing through vegetation and axes and saws that help you cut through any situation.

Scent-blocking technology gives hunters the upper hand. This apparel technology prevents the growth of odor-causing microbes-so your game never knows you’re coming.

Hunting jackets, vests and thermal baselayers let you customize your level of warmth in the field. Always ensure your hunting gear is built with fabric that moves quietly as you’re stalking game or positioning form the shot. Soft fabrics minimize sound and deliver all-day comfort and mobility.

All-over camo prints keep you concealed, while blaze-orange keeps you visible to your fellow hunters. Breathable bibs and overalls provide protection-choose a pair with plenty of pockets for stashing away tools and essentials.

Discover apparel for hunters of all stripes, including women’s hunting apparel for her and kids’ hunting clothes for youngsters. Shop all hunting equipment like realistic turkey decoys.

read more
HuntingHunting Equipment

Find the Best Hunting Knife – Hunting Knife Set

hunting_knife

Hunting is one of the oldest and most primal hobbies we can still enjoy. Nothing compares to the struggle against nature, and the satisfaction of bringing down your prey. These tools will help you make the most of your next hunt.

Hunting has been and remains a core tradition. We are constantly making refinements that improve the performance of our knives and crafting new designs that allow hunters to improve performance of field dressing and skinning.

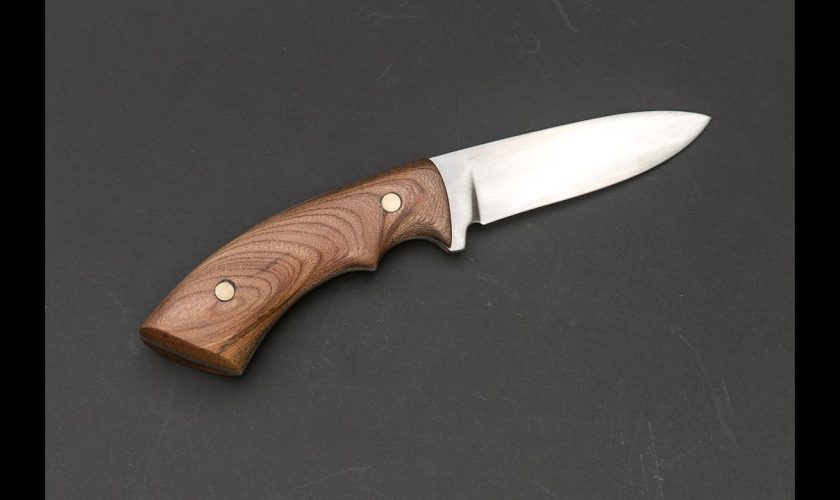
Once the telling shot has been fired and the trophy of a lifetime is on the ground, the real work of the hunt begins. You’ll need a rugged knife with the right heft and proper blade shape – one that’s made from top grade steel, honed to a razor edge. That’s why a Browning hunting knife deserves a place on your belt or in your hunting pack. Its outstanding balance helps transmit every precise cutting movement from your hand to the blade as you field dress game.

Quality hunting knives are an essential part of any outdoorsman’s gear, we offers the top brands available. Whether you’re searching for a classic straight-blade knife, a curved-blade skinning knife, or even a gut hook, we are one of the best selections of hunting knives online today.

Anybody who is serious about their hunting realises that a good quality hunting knife is a must have. We have an extremely large range of hunting knives (including fixed blade hunting knives) for you to choose from and are happy to deliver to your doorstep.

If you are looking for a particular hunting knife and we do not have it listed here please feel free to contact us and we will see if we can get hold of it for you.


Fixed Blade Hunting Knives

Every hunter’s trusty companion, the hunting knife is useful for everything from preparing your meals to dressing your kill. Here is a list of economy models. Also try our tactical knives.

Folding Hunting Knives

All the usefulness of a full sized hunting knife in an easily portable folding pocketknife form.


Hunting Blades And Camping Knives

From preparing a fresh catch to serving a delicious dinner over the family campfire, a knife or multi-tool is a must have for any outdoorsman. Great for robust applications, like chopping and slicing, fixed blade hunting knives and camping blades offer a strong, sturdy feel. Some come with gut hooks for field dressing as well as sheaths that allow safe carrying and storage. If you’re looking for something a little more compact, go with a folding knife. Built for easy portability, many camping knives are made with sturdy metal handles and locking mechanisms that keep the blade and other attached tools safely tucked inside while in your pack or pocket.


Tactical Knives And Throwing Blades

Quality knives and tools can make a real difference in extreme outdoor settings and at the target range. More robust than average hunting knives and camping blades, tactical knives offer military-grade features. If you’re not sure which style blade you’ll need, many boast dual-edge designs with straight and serrated edges as well as folding models that are fast and easy to deploy in emergency situations. Whether for sport, combat or general skill building, throwing knives made with sharp tips land securely in most targets. Just like the fixed blade, they’re often made with slim, metal handles for a balanced feel throughout each toss. They’re also often slim enough to fit into a single pouch for easy carrying to the target range and packing on trips.

read more
Hunting Equipment

Hunting Blinds Buyer’s Guide – Choosing the Best

hunting_blind

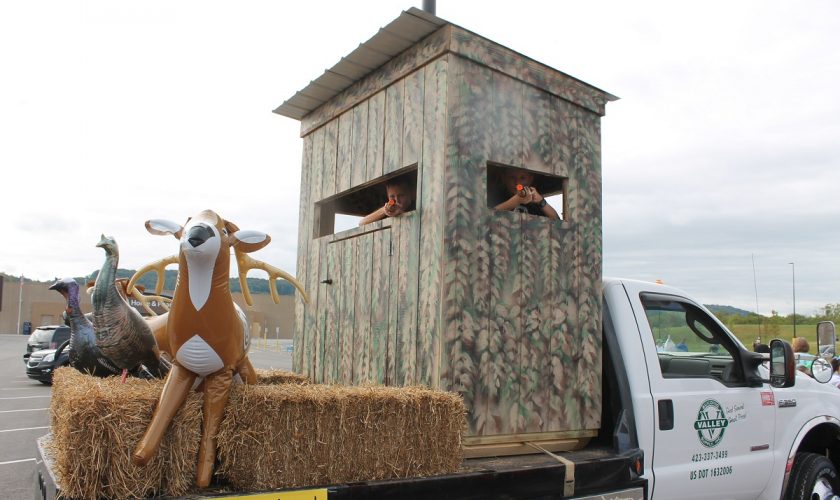
Hunters have used deer blinds over the last century to great success. Learning how to choose the perfect deer blind for your needs can be an important first step in taking your hunting skills to the next level. Having the ability to watch your prey without being seen give you a far better understanding of your target. It also allows you to take a cleaner shot without worrying about alerting your prey and missing your opportunity.

Recently advances in camouflage have increased the effectiveness of these hunting tools and as a result of this, many new hunters are rushing to the market to purchase one of these tried and true hunting blinds. The problem is not every hunting blind is created equal and the majority of blind manufacturers lack he experience to deliver a high-quality product that is both effective and reliable. Luckily there are some manufacturers that have proven themselves to be quality concerned.

  1. Why use one? The obvious reason is to conceal you from the eyes and ears of game. There are many other reasons, not the least of which is the ability to move. Ever been in the woods and wanted to pick up and hunt another spot? It’s an easy proposition with one of these blinds. If you plan to hunt with someone, they are great, especially if you’re introducing someone to hunting who hasn’t enjoyed our sport before. Sometimes it can be hard for a child to sit perfectly still and a blind means they don’t really have to. Sharing that time in the woods with a significant other would also be a good use.
  2. What do I want from my blind? You have to remember that these are intended to be portable blinds. If you want to leave them out all year, you may wish to look into something else. While they can take seasons of abuse, they are made with lightweight materials so that if you want to move around, they can be moved quickly and with little effort.
  3. What am I going to do with my blind? You can hunt deer or any other big game as well as turkeys and even waterfowl with some models. Are you going to bow hunt or rifle hunt? Some blinds are good for both while others are really meant for one or the other. Make sure the blind has the space to fit your style of hunting.
  4. Will the camo pattern the blind comes in fit my hunting area? Most blinds have several choices for camo. Pick the one that fits the area you want to hunt. Some come in general patterns that blend in everywhere while others are quite specific. There are even blinds that are reversible with two totally different camo patterns on each side to give you excellent versatility.


Bullets, Sticks, and Strings

What type of hunting you do will also play a role in determining which is the better blind for you. The blind that I used was a rifle-hunting blind. There wasn’t really enough room to maneuver a bow for a shot and it was even a little tight with a rifle. Take a good look at the dimensions of each model you’re interested in before you buy. Some models are made for taking archery shots from a sitting or kneeling position. Is that something you’re comfortable doing? If not, you need to look into a taller model that will allow you to maneuver. A good idea is to take the dimensions of one you are interested in and then use a tape measure to estimate if it will work for you. Most blinds fall in the five to six foot height range with some reaching for the seven-foot mark. These taller blinds are designed for the hunter wanting a different shot option. Many blinds too offer enough room to pull back and maneuver a bow, or have more than one person in the blind and still have enough room for movement. The friend that loaned me that first blind had originally ordered it for bowhunting. He was very disappointed and ended up buying another blind. You can avoid that frustration with a few moments of planning.

One thing that is obviously important is to set up your blind before you take it into the field and practice whatever type of shooting you’ll do. Take archery shots from whatever position you find comfortable and if you’re going to be sitting, use the seat platform you’ll be using in the field. Many of the blinds on the market now use a window system that allows you to shoot through the screen mesh without interrupting the flight of your arrow. This allows you to remain concealed within the blind and effectively take game. These window screens are replaceable and relatively inexpensive, allowing you to practice as much as you need to. They share the camo design with the blind and help it blend in more effectively because there is no gap in the pattern. The window blends in like natural shadow further enhancing the natural appearance. If you’ve ever worn a mesh facemask, the result is quite similar.

Many hunters are experiencing animals walking directly past the blind without hesitation. If you’re bowhunting skittish toms that have been pressured hard all season, how nice would it be to have them walk by the blind just a few feet away? The same goes with deer, especially with a scent-control model.


Ground Blinds

Gain the hunting advantage and get close to your prey with quick set-up ground blinds and portable pop up blinds from Sportsman’s Guide. We carry Hub Blinds to fit any need and budget. Shop your favorite trusted brands for ground blinds always at low prices.


Designed for Hunting Success

With The Blynd’s 7” x 29” tinted window openings, you will easily see the deer coming and will have access for full motion shooting—but the deer won’t see you. The single model has four window openings, while the two-man model has six.

Our box deer stands can be used with our custom-made deer tower stands. A number of deer blind accessories also are available to add to your comfort and ease of use of this deer hunting blind.

Made of weather-resistant materials, The Blynd is designed so that the windows can be closed, the door locked, and the blind left on your lease or your ranch until next season. But, it is still lightweight enough that even after it has been assembled, it can be moved to where the deer are active—no trailer needed!

read more
HuntingHunting Equipment

Hunting Bow and Archery Equipment Buyer’s Guide

hunting_bow

Whether you’re looking to upgrade for the coming season or are just getting into archery, the information below will help you find the perfect bow to fit your needs.


Cam Selection

A lot has been written about cams (or wheels) over the years. The different styles, shapes and individual features are numerous, but they generally can be narrowed down to five distinct types: round wheels, single cams, dual cams, 1.5 hybrid cams and binary cams. Each have their own set of characteristics that dictates their best application. Factors that make an archer choose a particular cam style over another are speed, comfort, tunability, quietness and accuracy.

Round-wheeled bows are the slowest of all compound bows, but they are still with us today for a reason – they are smooth and accurate. Round wheels are reasonably quiet, vibrate very little and are easy to tune. Due to their rainbow-like trajectory, they are not a common choice for hunting applications.

Single cams are matched to a round idler wheel. Their popularity has been such a success that virtually every bow manufacturer today produces a single-cam bow. They are very easy to tune, since there is only one cam that rolls over.

Dual cams typically offer more speed than a single cam, but also require more tuning and maintenance. Both cams need to be synchronized to maximize the bow’s potential.

The 1.5 hybrid cams are a newer style of cam. They are a combination of both a dual cam and a solo cam. The speed of the hybrid cam is oftentimes comparable to dual cams. It functions the same as a solo cam, where the idler wheel is replaced with another cam. The addition of the second cam offsets the movement of the nock as compared with a solo cam.

Binary cams are similar to dual cams, except both cams are slaved to each other. This means that each cam rotates the same amount when drawing and shooting, making a binary-cam system virtually maintenance-free after the initial tune.


Which Bow is For You

Selecting the right bow is a personal thing, and the decision will depend a lot on what you will be doing with it. Here are a few things to look for when deciding on a compound bow:

Axle-to-axle length (ATA)

This is the distance between the axles of the cams (or cam and idler wheel). Much like the balancing pole a tightrope walker uses, a longer ATA will make it easier to hold the bow in a steady, vertical position. However, if you’re going to be hunting from a ground blind or treestand, or stalking through thick brush, a bow with a shorter ATA will be easier to maneuver. Most hunting bows have an ATA between 31” and 34”.


Brace height

Brace height is the distance from the string’s resting position to the groove in the bow’s grip. Brace height influences a bow’s power stroke (the distance the string travels) and greatly affects arrow speed. A shorter brace height increases arrow speed, but it also magnifies any errors in the archer’s form. A longer brace height is slower, but since the arrow is in contact with the string for less distance, errors in form are not as noticeable. 6” to 7” brace heights are most common.


Bow weight

As a general rule, heavier bows are easier to hold steady, but can fatigue an archer more quickly. Lightweight bows can take more practice to shoot accurately, but are also easier to carry on hunting trips. The average hunting bow weighs around 4 to 4.25 lbs. without accessories.


Adjustability

Again, make sure your bow can be adjusted to your draw length and weight. Most compound bows have draw-weight ranges of 10 to 20 lbs. – you’ll see a lot of 60- to 70-lb. and 50- to 70-lb. bows – but if you’re growing or just getting into archery, there are an increasing number of bows with even higher draw-weight adjustability, letting you start out low and work your way up to your target draw weight. Likewise, most bows have a draw-length range of approximately 4-6”. If you’re done growing, then this is fine, as your draw length will not change. For youths, a bow with a larger draw-length range will be able to adjust as they grow.

Understanding the different features of a bow and applying them to your specific hunting conditions and need makes selecting the right bow for the job much less difficult.


Best High End Crossbows – Top 5 Crossbows

The selection to determine my top 5 crossbows was made on few specific criteria to determine the exact ready-to-shoot crossbow.  I wanted to make sure I had the best value for the price. There is no point to invest that amount of money if you don’t have what you paid for.

Therefore, the technology included in the crossbow came as my first criteria. Small details come at a price but make a huge difference on the field. This point encompasses, the structure of the stock, the flight track, the accessories to dampened the sound and the technology related to its precision.

Second, quality of the scope. Is it already sight-in out of the box or many manipulations are needed to obtain great groupings in few shots.

Thirdly, the maneuverability of the crossbow. Its general design, compactness, how easy cocking the crossbow and safety toward movement while aiming at moving targets.

Finally, the overall result of the accessories included in the package. This point includes the quiver, the bolts, the crossbow case, wax, etc…

Now that you know how I based my selection, here are my best high-end crossbows. I also included different models otherwise compound crossbows would be all over the place according to me.


Excalibur Micro Suppressor Crossbow

Awards: Best recurve crossbow for its durability and reliability

They made all the modifications necessary on the Excalibur Micro Suppressor to make this crossbow almost without any cons, except for the draw weight and its specific bolts length. In past years, noise and total length were main issues for recurve crossbows. Excalibur understood what customers really wanted from a recurve crossbow. They wanted more durability, a more compact design and almost no sound and vibrations when shooting.


Parker Tornado XXT Crossbow Package

Awards: Look rough made tough for best durability over the years

Made by Americans for Americans. The first thing to say about Parker crossbows it’s there are more efficient than first at the beauty contest. They have basic shapes and no fancy design and it’s exactly what you want from them. They are performance-oriented products, not focused on their look. However, they are definitely not the worst and they are making a lot of changes to improve their designs. Quality and durable products, it’s what you can expect from Parker.

Barnett Razr Ice Crossbow

Awards: Best Ready-to-hunt crossbow package

This is the real ready-to-hunt package! The Razr ice has it covered for you so you can shoot and harvest your target. A great crossbow for maneuverability, precision and easy to use for beginners or more experienced shooter. Barnett loaded this model with all the good stuff. With almost no cons the Barnett Razr Ice Crossbow offers according to me, one of the most exciting experience for its category.


Browning one six two Crossbow

Awards: Best high-end crossbow for beginners.

A new player on the crossbow market but clearly not a new player in the world of hunting. Browning is a well-known brand in America and the good news is, they brought the same quality into their crossbows as they did in their guns. Browning aligned themselves with Barnett to ensure their entrance into the market at a lower risk.

Tenpoint Carbon Nitro RDX Crossbow

Awards: Top notch shooting experience and maximum precision without many modifications

The most expensive of my ranking but amazing ballistics numbers. The precision obtained with the Carbon Nitro RDX crossbow is stunning and this, without modifications. Tenpoint has no need for an introduction, their products always come with high standards of quality. This reverse draw limbs crossbow will give you one of the smoothest shooting experience you will ever have.


What Makes a Recurve Bow Great For Hunting?

I don’t want to simply “force” some specific bows down your throat; I want you to actually understand why it is that I’ve chosen the bows listed above. With that in mind, here are the things that make a recurve great for a hunter.


It needs to be quiet

This is likely the most important thing to keep in mind. Nothing is more annoying than setting up for that perfect shot after an hour or two of tracking or luring your prey, only to have them run away due to the noise generated by drawing the string on your bow. So how do you solve this?

By choosing a bow that is specifically designed to minimize this kind of noise. These will include limbs made from specific, “quiet” material. They will be well tuned. They will include dampners or other elements designed to silence the string.


The draw weight needs to be just right

This one is a bit of a variable, but nothing we can’t handle.

I strongly recommend that you never use a recurve bow for hunting unless it has a drawing strength of 40 pounds or more. The reason being that, during hunting, you will want your arrow to pierce your prey and penetrate the body deeply enough. Unless your recurve has a draw weight of 40 pounds or more, and especially if you are shooting from further than 15 yards away, chances are you will just injure the animal without actually killing. It will then run away, needlessly suffer, and you’ll even lose your arrow. That’s not all though.

You need to choose a bow with a draw weight that you can handle. When hunting, you often need to draw your bow and then hold for a minute or longer before actually firing. If the draw weight is too much for your muscles, you will start to shake and your aim will suffer greatly.


It needs to be long

This one is simple: the longer the total lengh of the bow (from tip to tip), the more accurate your shots will be. How long exactly?

The best recurve bow for hunting will have a minimum length of 58 inches. The longer the better. You will notice that almost all of the recurves in the list above have a length of 60 or more inches – you now understand why.

Ease of transport should be considered

This may not seem like an issue for you now, especially if you have never used a bow before, but believe me – transporting a 60+ inche bow in a safe manner (you don’t want the limbs to get bent or worse – broken, do you?) can be a real hassle. Now, if you have a big enough car to transport your bow easily while avoiding damage to it in route, that’s great. Otherwise…

You need a takedown recurve bow for hunting. In case you didn’t know, a takedown bow is one where you can quickly detach the limbs from the riser by unscrewing a few screws. This makes storing and transporting your bow so much easier.

read more
There's A Newsletter For Everyone!
Enter your name & email address, and start getting the best of 3hack.net in your inbox!
ENTER YOUR NAME
ENTER YOUR E-MAIL