close

Sport

CampingEquipment

Portable Camping Toilet – Where to Buy and Choosing the Best

camping_toilet

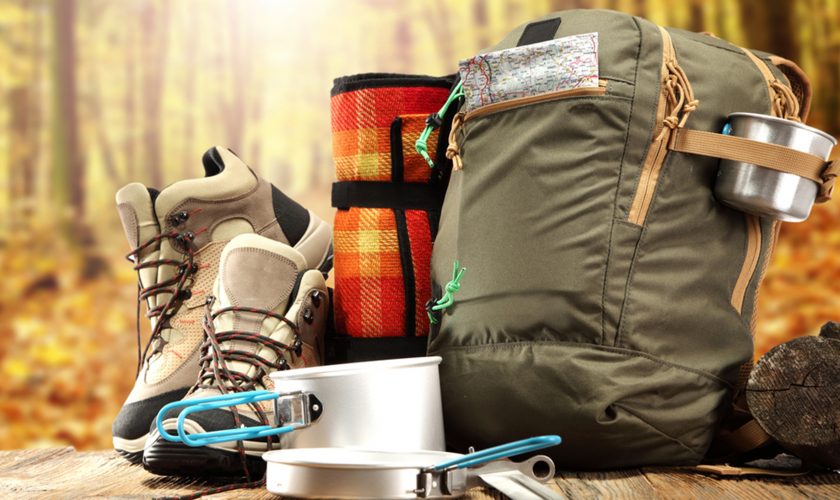
Whether you are primitive camping, have a favorite tent site or use a pop-up camper for your outdoor adventures, you are probably missing one thing that would make your outing much more comfortable. Can you guess what it is? Well, if you have ever experienced ‘nature calling’ without a bathroom facility in the immediate vicinity- you guessed correctly- that one thing is a portable toilet. In fact, if you have females or kids in your camping party, a portable camping toilet can make everyone’s trip much more enjoyable.

Portable toilets are often referred to as “camping toilets,” but they’re not just limited to camping trips. Portable toilets are used any place where traditional facilities are inconvenient or absent entirely—from boats to campsites to cabins to workshops.

There are lots of different options when you’re shopping for a portable loo. In this guide, we’ll introduce you to all the various setups you can use, and show you a few of the best we’ve found. Our in-depth reviews will help you learn about the pros and cons of each approach and each model in particular.

Portable toilets and chemicals are important for caravanners and campers alike. When you need to go to the toilet it’s great to have access to one of your ‘home comforts’ even when you’re away from home, but when you’re staying in a caravan or camping you don’t have the all-important plumbing that takes it all away.

5 Things When Buying a Portable Camping Toilet


Waste Disposal

Your portable toilet will need emptying at some stage. The question is where do you empty it? While water flush toilets are in some ways more convenient to use they do need special sites to empty them. Many RV sites have these facilities but if you are traveling in the wilds emptying can become a little more problematic. Many areas have restrictions on buying such waste – so check before you travel. Biodegradable sacks, specifically designed for portable camping toilets, are easier to dispose of in open countryside. They usually contain a powder that turns liquid waste to solids. These can then be buried. They should be at least 6” deep and at least 100 yards away from any water source. Toilet paper can take the longest to break down, so it is preferable to have rapidly disintegrating toilet paper (which can usually be found in camping supply stores).
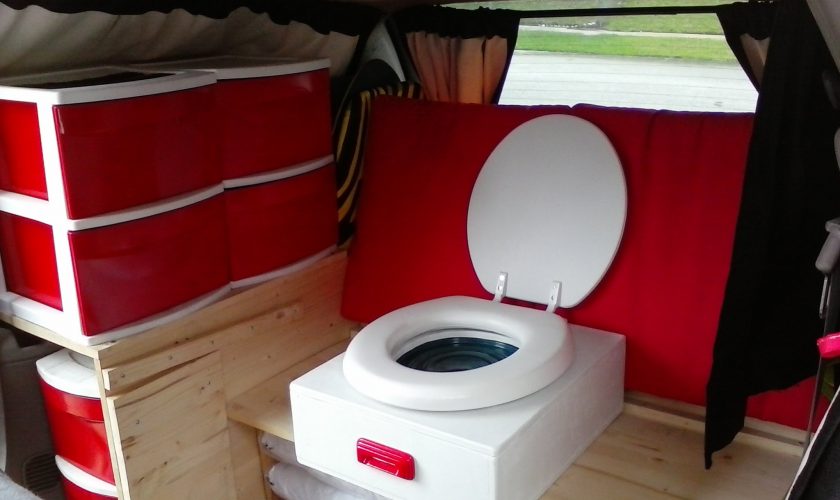
 

Volume of Toilet

If you are, for example, going away as a couple for an overnight camp, you will obviously need a smaller toilet that if you are going away, as a family, for a week or so. When you are looking to buy a flush toilet it often gives examples of how many flushes the toilet can cope with before emptying. It’s not an exact science, but it will give you an idea of the size of toilet you will need.

Ease of Use

While RV parks and boating marinas usually have a dedicated toilet area, when camping the toilet often needs to be set up each time you stop for any period of time. Part of the selection process in selecting the best portable toilets in our reviews was the simplicity and speed offsetting the toilet up ready to use, it should be born in minds that the location in which you wish to use the toilet can be a factor to consider.


Dimensions of Toilet

Both flush and bag disposal toilets come in a variety of sizes, not just the volume of waste that they can take, but also the measurements. In boats and RVs, where space is often at a premium, take a careful note of the toilets dimensions before you buy. In addition to fitting the toilet into the space, you also need extra space around it to allow for removing the waste container for emptying.

When hiking, the size of the toilet is even more important and possibly a choice of the Cleanwaste Portable Toilet or the Cleanwaste GO Anywhere Complete Toilet System may be worth some consideration. Another important factor, especially for larger people, is the weight capacity that each toilet can take.


Privacy

Most people, when thinking of a portable toilet, think of camping or boating. Another situation where portable toilets can be advantageous is for picnics or tailgate parties. The Cleanwaste GO Anywhere Complete Toilet System is one of the few portable toilets that comes complete with a privacy shelter. But there are several privacy shelters that can be purchased separately that will provide a private are to use the toilet.

read more
CampingEquipment

4 Person Camping Tent for Overnight, Outdoor Adventures

4_person_tent

Tents are primarily categorized based on capacity so it is helpful to know how many people you’ll need to accommodate on your hike or camping trip.

Choosing the right tent for your activity level and trip duration will ensure a good night’s sleep in the great outdoors. Below are common types of tents:

Cabin Tents – best suited for established campgrounds or base camps. Ideal for families, these basic camping tents feature a large, square design with high ceilings, a rigid construction and vertical walls to accommodate cots, chairs, coolers and other creature comforts.

Wall Tents – also known as outfitters tents, wall tents are large, framed canvas tents that are popular with hunters and backcountry campers. Among the largest and most accommodating, these camping tents feature a rigid construction and provide lots of room.

Dome Tents – among the most popular types of family camping tents for their simple, easy to assemble construction. Available in sizes from a lightweight 2-person tent to a heavier to 6 or 9-person version, dome tents use flexible tent poles versus the rigid construction of Cabin and Wall tents.

Our 3 man and 4 man tents make ideal tents for a pair of campers.

Comparing tents based on how many persons the manufacture recommends the tent can sleep, is quite difficult. As you can see below, the size of a so called “4 man tent can vary enormously.” Some of the tents on this page could sleep 5 at a push, with others been barely large enough to sleep a couple.

Whether you’re a couple or two friends at a festival, it’s probably going to be two people and two sets of luggage – in this instance we would recommend looking toward our 3-4 berth range of tents for space and comfort.

These tents are quick and easy to pitch, which makes them a great option for a long weekend at a festival, or a spur-of-the-moment camping trip with friends or a companion. Look for features such as a built-in porch to keep your muddy boots out of the living area of the tent.

Understanding the different types of camping and outdoor tents available will help you choose the right gear for your next overnight trip. A tent to take on a long backpacking expedition will require a different tent that you might use on a family camping trip.

If you buy a 2 or 3-person backpacking tent, you can travel light, yet you will have room for extra storage. Boots, backpacks and other materials are generally kept under a rain fly and outside of the tent.

Whether you’re camping alone, with a partner or a large group of friends, here at BCF we have you covered – literally. From music festivals through to bush camping or a bit of backyard fun, features such as anti-insect netting, storage compartments and skylights, mean our range of dome tents suit every occasion. With basic through to deluxe dome tents from well-known brands such as Coleman ensure you have both comfort and quality when enjoying the great outdoors. Choose from tents with separate bedrooms, fibreglass rods, windows and more – it’s your choice, so head into BCF to check out our range now.

Camping that isn’t cramping. In our humble opinion, the industry’s standard definition of a 2 & 4 person tent footprint is too damn small. For Freecountry Camping, we think that’s cramping, not camping. We’re happy to introduce an upgrade to your standard room. Everyone needs plenty of elbow room and headspace, especially if you’re logging some tent time in the rain. Our Suite Dream series provides unprecedented roominess for you, your friends and all your stuff!

read more
Camping

Folding Camping Table – Portable, Kitchen Table, Cooking

camping_table

If you’re heading off on a camping or caravanning trip, you might need to grab a few camping furniture essentials for dining and relaxing.

From fold up chairs that can easily be transported to the beach to camping tables for the classic campsite BBQ, our range of camping furniture will make sure you’re all kitted out.

Pick up a picnic blanket in whatever pattern strikes your fancy, or step up the luxury with a camping hammock that’s perfect for afternoon snoozes in the sun.

Camp Tables To Fit Your Space

Whether you’re setting up for a compact campsite or you’ve got acres of land, there’s camp furniture to fit your space. If you’re looking to set up a station for your cooking area, complete your camp’s kitchen with a prep table with integrated storage to accommodate all your cookware and utensils. Time for the family reunion and a big dinner for everyone? Opt for generous-size camping tables with built-in benches that fit the whole gang.


Durable Camp Tables

Roughing it in the great outdoors requires sturdy gear that can keep up. Tough camping tables made of steel, aluminum and other strong materials stand up to the rigors of outdoor use, while rugged construction with telescoping legs offers structured support for heavy loads ribs, burgers, potato salad and other picnic and barbecue favorites. When mealtime is over folding camping tables with durable surfaces that resist spills make cleanup easy.


Stow-And-Go Folding Camping Tables

Unfortunately every adventure has to come to an end, but easy-to-fold camping tables take the work out of breaking down camp and heading home. Folding camping tables help save space and fit in your car or RV with room to spare, while carry bags let you load up your gear in record time. Cut down on packing time even more with camp tables with integrated handles for a firm grip and fast transport.

Our range of camping tables come in all shapes and sizes. Folding camping tables, adjustable height and great camping picnic tables. The best camping tables are ones that are lightweight but sturdy and can be folded away when not in use. Tables come into their own in the evenings when you can lay out your maps to plan your next days hike or enjoy a competitive game or two! We stock roll up tables where the legs fold away and the aluminium slatted top rolls up – perfect for taking to the beach or using in your own garden when you have extra visitors. Our folding tables are lightweight, strong and the folding feature ensures they dont take up too much space. A folding table is great if you are planning on having guests around or for a summer barbeque in the garden. Put it up and pack it away within seconds!

We have a range of tables ranging from small to large suitable for all types of camping set ups or even parties. Our quality brands include Coleman, OZtrail, Companion and Lifetime

We have a large range of table in a variety of types and styles including…

Fold-in-Half Tables: Fold in half tables are well sized yet lightweight, foldable and portable, perfect for your camping adventure.

Blow Mould Tables: Blow mould camping tables are strong and sturdy and made from high quality materials, does not compromise on finish and is sturdy as well as stylish.

Slat Tables: Are strong aluminium tables with a compact folding design and heat resistant top – idea for travellers. Slat Tables folds up for easy carrying and compact storage.

Our tables are suitable not only for camping but for use at home as well.

read more
CampingEquipment

Sleeping Bag – Backpacking, Double, Linker, Lightweight

sleeping_bag

A proper sleeping bag is one of the most important choices for any backpacking trip. It’ll be critical for warmth, comfort, safety, and helping your body get the rest it needs. Your sleeping bag will also be one of the four heaviest items in your pack (shelter, sleeping bag, sleeping pad, and backpack), so it’s a good place to save weight as well.

A sleeping bag can be the difference between a good and bad night’s sleep while camping. With so many different varieties on offer, you really can choose the right sleeping bag for you.

Whether you are camping in the cold and looking for a down sleeping bag, a double sleeping bag for a couple’s holiday, or a cheap sleeping bag for festivals or sleepovers – you’ll find it in our range. Take note of the season ratings on our sleeping bags, the higher the rating the warmer the sleeping bag will be.

Mummy sleeping bags offer a tapered shape and a hood to help keep you warm during the night, while square sleeping bags sometimes have the option of zipping together to create a large double bag for two.

Move around a lot in your sleep? Why not take a look at our sleeping pods range – freedom to toss and turn in your sleep and still warm and cosy.

Get some real zzzzzzz’s

Comfort and warmth in the backcountry, your backyard, or anywhere you choose to rest your head for the night is the key to an overnight outing being awesome, not awful. That’s why we are committed to making sleeping bags that mimic your cozy bed at home as much as possible with the highest quality, lofty fills and soft, technical fabrics. Whether you choose a Big Agnes System bag or a traditional mummy, all of our bags optimize your own body heat for maximum efficiency and we make a bag to fit all shapes, sizes, budgets, couches, floors, truck beds, tents, and dirt.


Family Camping

Family vacations often double as mini camping expeditions for you and your loved ones, so make sure that everyone is well-equipped for the next adventure. Rectangular sleeping bags are roomier and less restrictive than those that are more formfitting, making them perfect for low-maintenance excursions. If you end up needing extra space or are sharing with someone, simply zip a second bag to the first one. Be on the lookout for sleeping bags with a foot box, which will help you stay warm while you sleep and are especially useful for those who sleep on their backs. When shopping around for men’s sleeping bags and women’s sleeping bags, keep in mind how often you plan to use it and under what circumstances to ensure the best possible fit for you.


Functional Sleeping Bags for The Whole Family

Most sleeping bags have a temperature rating, which indicates the lowest number of degrees in which you can snooze outdoors and still reasonably expect to stay warm. Insulation is an important factor when searching for a bag purely for utility. Men’s sleeping bags and women’s sleeping bags with hoods help to trap in any heat you may lose from your head while you catch some z’s for the ultimate in toasty comfort. Compression sacks are useful if you require a sleeping bag that will take up as little space as possible you’re out on the trail, and water resistance can mean the difference between a good night’s sleep and a long, cold, wet night. For a more serious backpacking sleeping bag, mummy sleeping bags are a great option. They require little room and are designed to keep you truly warm in low temperatures. Rest easy knowing you’ll have a reliable place to hit the hay after you’re done hitting the trails with our selection of sleeping bags, airbeds and cots.

Sleeping bag wisdom: Tips, terms, and care

Sleeping soundly in the woods

Walk around camp or do sit ups in your tent inside your to get your heart going and blood flowing. The more heat to you go to bed with, the longer you’ll be warm.

Rochfort suggests drinking a hot drink before bed, too. On really cold nights, I used to pour that hot drink into a Nalgene bottle, wrap the bottle in a sock, and then pinch the bottle between my legs (where you have some pretty large blood vessels). Make sure the lid is on tight!

Sliding off your sleeping pad is always annoying in the middle of the night. Big Agnes makes sleeping bags with integrated sleeves for hold your pad in place but anyone can make any sleeping pad less slippery. Just add some dots or thin strips of seam sealer across your pad. It’s grippy non-tacky stuff and will help you stay in place.


Care and maintenance

REI has some important tips and tricks aimed at keeping your bag in good form. They cover how to sleep in it, clean it, treat it, and store it. We’ll break down the basics for you here as well.

When on the trail, try to sleep as cleanly as possible to keep dirt and body oils from collecting in your bag, necessitating more frequent washing. This is harder to do on long expeditions, but it can be done by keeping one set of clothes that you wear only when in your sleeping bag. Call it your sacred outfit. Don’t eat in your bag or your tent, especially in bear country, no matter how tempting it might be in the Mobile Mummy.

A sleeping bag liner not only keeps your bag clean but also adds warmth. Whether you use a liner or not, make sure to fluff your bag after it has sat compressed at the bottom of your pack all day. This helps you get all the loft, and therefore warmth, you expect.

When you’re not using it, store your bag unstuffed or in the oversize sack that comes with the bag. This will help it maintain its loft and last longer.

The safest way to wash a down bag is by hand in a bathtub, or you can use a front-loading washer (top-loaders will rip the stitching and should be avoided). Nearly anyone who regularly washes sleeping bags has a preferred favorite soap; for down, we like Nikwax’s Down Wash Direct, and for synthetics, go for Nikwax’s Tech Wash. Air dry your bag when done, or insert a couple tennis balls and dry it on air fluff–no heat!– in your clothes dryer.

read more
CampingEquipment

Tent Camping Checklist – Best Camping Tent Reviews – A Buyer’s Guide

camping_tent

Spacious, user-friendly, and feature-rich, tents for camping are made for a relatively luxurious experience in the outdoors. Many of these behemoths offer enough room to set up cots or even chairs and a table for card games on a rainy day. The majority of car campers take only a few trips a year, usually during the peak summer months, and even the cheapest tents on this list will perform well for this type of use. For tougher weather conditions or as a long-term investment, consider springing for a better-built and more expensive model.

No matter how old we get or how wrapped up we are in the perpetual ongoings of our daily lives, there are few things that bring us back down to reality other than unplugging and dashing towards the forest for an extended stay. Be it with the entire family, old friends, a special someone, or just yourself, camping helps you get back in touch with the world we left behind so long ago in favor of LED screens and high-rises. It’s time to reacquaint yourself with an old friend, time to ditch the cell phone and the email notifications. It’s time to embrace the wilderness.

No matter what your experience level in the outdoors, odds are you understand the need for shelter. And in this particular instance, the need for a tent. But not just any tent. Because in this world, you truly get what you pay for. Now, that budget tent might have felt like a great purchase while it sat cozily on the store shelf or stored away in the garage, but what happens when the weather turns, poles start bending, and the zipper to your mosquito net starts to snag?

Don’t fall victim to those “best deals” out there for tents. There’s nothing worse than having what was supposed to be a weekend of rest and relaxation descend into rage and regret. If you’re worried about what’s out there, don’t be, we’re here to help. In fact, we’ve assembled a list of the top ten best camping tents around to ensure that remaining comfortable at night is the least of your worries while unwinding in the wild.

There are two kinds of car-camping tents. The first is affordable and made for quick weekend jaunts with the family or drunken festivals in the woods. The second is more expensive, better constructed, and preferable for trips across the country where you’ll be camping in everything from scorching heat to torrential rain.

When you’re going to be lugging your tent a couple hundred feet from your car at most, you don’t need an ultralight, high-tech design. Something big and boxy is fine, and the extra space can help you stay organized and sleep more comfortably; you’ll also look forward to returning to your ready-to-pitch retreat again and again. With a peak height of 7 feet and a cubelike shape, the Copper Canyon 6 was among the roomiest of the tents we tested. Though it isn’t built for stormy weather, it is tough and durable enough to ride out most rain and wind storms. With a time-tested design, this popular tent is one you can expect to pitch for years to come.

The Coleman 6-Person Instant Cabin is bulkier when bagged and smaller when standing than our favorite Eureka Copper Canyon tent. It also has smaller windows, fewer pockets, and lacks a mesh roof for stargazing. But thanks to telescoping, pre-attached poles, it goes up and down much faster than any other tent we tested, and it has no fly to bother with.


Care, use, and maintenance

We found that company representatives are reluctant to estimate the lifespan of their tents. When pushed, most of those we talked to estimated five to 10 years, though the actual lifespan will vary widely depending on care and frequency of use (read REI’s excellent tips here). In researching this guide, we heard multiple tales of careful campers who have been using the same tent for 15 years or more.

There are several straightforward ways to make any tent last longer:

Use a groundsheet. A “footprint” made by the same company as your tent and sized to match is ideal for preventing pooling water—and avoiding the wrinkles and crumply sound of a cheap $10 tarp. That said, a cheap tarp will do the job just fine as long as you buy it or cut it to fit. A too-big tarp will collect rainwater off the fly and funnel it right under the tent.

Clean your campsite. Before you lay out your footprint and tent, make a reasonable effort to remove from the site any small stones, sticks, and briars that could puncture your tent floor.

Set down some ground rules. “Your tent is your sanctuary,” said camping expert Helen Olsson, who would always bring a “play tent”—an old, two-person backpacking tent—for her little kids to use as a daytime play space. When they were in the “real” tent, everyone followed Olsson’s “No shoes in the tent” rule.

Similarly, keep your tent zipped to keep bugs and critters out, and turn your kids into pro zipper users: Teach them that a thumb placed in the area forward of the direction they’re pulling the zipper will clear the fabric path and help avoid snags.

Sweep out before packing. Tiny pebbles or sticks packed inside the tent can rub and erode the material over time. Another nice thing about tents that retain their structure without being staked is that a couple of people should be able to team up to lift the tent and shake out detritus before removing the poles and putting the tent away. You could also follow the lead of type-A campers and carry a small whisk broom and dustpan to keep the tent floor tidy during your trip.

Dry before storing. “Nothing will destroy a tent faster than mildew,” tent designer Bob Howe told us. “And if it doesn’t destroy it, it just makes it unlivable.” To avoid mildew (and the accompanying stink), never, ever pack away a tent that’s still damp. Line-dry it or hang it up in your basement—or set it up in your garage—until any hint of dampness is gone.

read more
CampingEquipment

Camping Equipment List, Buying Guide, the Best Pick

Camping equipment

Ready to get out of town and head into nature? Get away from the distractions and plan your next camping trip. Whether you are an experienced camper that enjoys long backcountry hikes, or you just want to try something new with the family in the great outdoors, we have all the camping equipment you need. Choose from a variety of quality, top-branded sleeping bags, tents and outdoor cooking supplies. Stay comfortable throughout the night with sleeping pads, air mattresses and cots. Be prepared for anything with camping essentials like flashlights, knives and bug spray.

We stock everything you could possibly need at brilliant prices, from tents that sleep as many as ten people, to all the necessary equipment including groundsheets, cosy sleeping bags, camping furniture and air beds. What is more, you can choose from a great selection of cooking equipment, meaning you’ll be able to whip up delicious meals as darkness descends around your tent.

From mountain trails to afternoons at the lake, pack up for the journey with camping and outdoor gear make the most of your next excursion.

Enjoy the outdoors with top-rated gear for your next adventure. Find shelter in camping tents designed for hassle-free set-up and protection from the elements. Rest peacefully with plush camping cots, sleeping bags and air mattresses that keep you cozy when temperatures delve.

Gather around the campfire or the tailgate with outdoor furniture, cooking equipment, outdoor grills, coolers and more.

Take on the trek with hiking backpacks and daypacks perfect for stowing away your essentials, like water bottles, hydration gear, backpacking tents and more. Pick up hunting knives, flashlights and camping electronics – outdoor gear that prepares you for anything Mother Nature throws your way.

Find everything you need for your next camping adventure right here at Sportsman’s Guide. We proudly carry the top brand names in Camping Gear & Supplies at awesome low prices. Shop our huge collection discount outdoor hiking and survival equipment and camping essentials!

Looking for a Tent? We’ve got all types and all sizes. Popup, Teepee, Dome, Backpacking, Cabin, Sportsman’s Guide has what you need at amazingly low prices. Take your pick from our huge selection of Sleeping Bags in either Mummy or Rectangle. Sportsman’s Guide also has Sleeping Bags made for winter camping that are constructed to take on frigid temperatures. From warm summer to -40 degrees, you’ll find a Sleeping Bag to handle your needs. We even have Sleeping Bags built for two! Don’t forget your Flashlights & Lanterns! Headlamps or Spotlights – you name it, it’s here. And, if you’re the camp chef, be sure to check out the latest Camp Kitchen, including Stoves, Grills and Propane Stoves too. Plus, don’t miss the Coolers, Dutch Ovens, Cast Iron Pans, Cookware, Utensils and other Camping Supplies. Haul all your essential gear with convenient and comfortable Backpacks & Bags. Looking to complete your tent or campsite or set up around the fire? Sportsman’s Guide has Cots, Camping Chairs, Hammocks, Cooking Station Tables and more. All here, and all for less.


The Basics: Essential Camping and Hiking Equipment

Let’s start with the most obvious camping-specific equipment: Tents, sleeping bags, backpacks, and all that other stuff that immediately comes to mind when you think of camping. This is all the expensive gear you’ve been putting off buying until you really needed it. Thankfully, you can get by with a lot less you think.

Tents, Tarps, Poles, Tie Downs, and Stakes: You’ll need something to sleep in, so a tent should be at the top of your priority list. There’s no such thing as a one-size-fits-all tent though. Tents come in a variety of sizes and in a variety of types. Some ultralight tents are best suited for backpacking, while other, heavier tents come with spacious luxuries best suited for hanging out near a car. To confuse matters more, most tents come in two varieties: three-season and four-season. Three-season tents are good for just about anything but the deep of winter, while four-season tents have more durable fabric that can handle snowdrifts. Good news though, as our friends over at The Wirecutter point out, most tents in the $200-$300 range are pretty good nowadays, so you pretty much can’t go wrong. They suggest the now discontinued Big Agnes Blacktail 3 person tent, but you can still snag it as new-old-stock for around $230. If you want to dig into the specifics of the differences between tent types, Backcountry walks you through the different types of backpacking tents, what to look for in weight, and how to choose the right seasonal variety for you. You’ll also usually want a footprint to place beneath your tent to block out water. Any of these will do the job.

Sleeping Bags and Sleeping Pads: Like tents, sleeping bags come in different weights and handle different temperatures, so you have to do some research to find the one best suited for you, where you plan to camp, and when. Outside Magazine’s best sleeping bags or the Wirecutter’s picks are good places to start. Wirecutter’s a fan of the $200 REI Radiant Sleeping Bag as a good all-around bag. Outside Magazine’s top recommendation is the Marmot Electrum, which you can usually track down for under $160. You will probably spend around $150-$200 for a decent sleeping bag. On top of that, most people will also want a sleeping pad, an air-filled pad that sits between your sleeping bag and the ground so you can get a little more comfortable. Our friends over at Indefinitely Wild have a rundown of the best sleeping pads for various budgets and uses. Which is best for you depends on your size, but I’m personally a fan of the $80 Therma-Rest Prolite.

Backpacks: Backpacks are an area where the distinction between camping and backpacking matters. If you’re camping, you arguably don’t need a backpack at all (though you want a good day pack if you’re planning on small hikes). In the backpack world, there are three main distinctions for sizes: day packs, overnight, and long haul. Which you need depends completely on what you plan on doing. Outside Magazine has a great rundown of some of the best packs for each type, but if you’re new to backpacking and don’t want to dish out a ton of cash, Indefinitely Wild has a cheapskate guide that keeps things as budget-friendly as possible. They suggest the Kelty Redwing for $140 as a solid but cheap bag that’ll hold what you need and won’t kill your back.

Headlamps, Lanterns, and Flashlights: Surprise! It gets dark in the woods, so you want something to help you see at night. Any cheap flashlight A sturdy, reliable flashlight will work here (LED is best, something like this $8 Mini CREE LED flashlight will do the job for most people), but having some extra gear is helpful too. A lantern like the Black Diamond Apollo Lantern for $44 is super useful for camping so you can make your way around the campsite and your tent easily in the dark, but it’s far too bulky for backpacking. For that, a headlamp like the $30 Black Diamond Spot Headlamp is surprisingly useful, especially when you’re trying to set up a tent after dark.

Water Filtration Systems and(or?) Treatment Tablets: If you’re camping, you can (and should) bring along as much water as you’d possibly need in your car, so it’s easily accessible. Some campsites even have fresh water available, but you should bring some anyway. If you’re backpacking however, that’s not an option, so you’ll need a water filtration system. For something on the cheap end, the Sawyer Mini Water Filtration System filters water and only costs $20 at Amazon. For a slightly more portable solution, Iodine tablets like these $6 Potable Aqua Treatment Tablets work too.

Hiking Boots or Shoes: Depending on the type of trip you’re taking, you’ll want to grab some hiking boots or shoes. Your sneakers will do just fine in many places, but if you’re planning on going for a longer backpacking trip, dedicated shoes are much more comfortable since they offer more support, padding, and stability for your ankles as your cross rough terrain. Of course, like everything else here, you have a million choices. In this case, your selection breaks down to boots, trail runners, approach shoes, and hiking shoes. Boots are clunkier but sturdier, so they’re good for people who like a lot of grip in their shoes and who like to jump into mud piles. Trail runners are light but have no real traction or ankle support, so they’re best for the nimble-footed who prefer to jump around. Hiking shoes are the goldilocks of each of those, they are lightweight, have good traction, and solid durability. They also tend to have low longevity. Approach shoes are meant mostly for climbing but sit somewhere in-between boots and runners. If this was an RPG, boots are for your tank, trail runners are for your high DEX character, and approach or hiking shoes are for your basic all around character. Each has their own list of merits and best use-cases, and Gizmodo compared the pros and cons of each type. For most people, they land on approach shoes as a suggestion, but more general all-around hiking shoes like any of these will do the job too.

Paper Maps: Regardless of whether you’re camping or backpacking, there’s a good chance you will not have cell phone service. Get a map of wherever you’re going before you get out there, then learn how to read it and not to rely on GPS, even if you bring a stand-alone satellite GPS unit. You can typically find a map from the ranger station near any park entrance, or you can print them online. Either way, make sure you have one.

First Aid Kit: It shouldn’t be a surprise that you need a first aid kit for camping. Include the usual aspirins, bandages, and gauze here, but also toss in some hiking-specific stuff like moleskin for blisters, bug sprays, and aloe vera for burns. Indefinitely Wild has a guide to put together your own kit, and the Washington Trails Association has a great checklist as well.

There are thousands of other gadgets, knick-knacks, and other gear available for camping, but most people don’t need more than what’s listed here when it comes to the essentials.

read more
FishingFishing Tips

Trout Fishing Tips – Rainbow Trout Fishing Gear and Lures

trout_fishing

Trout is a term used for several types of fish that are a part of one of three genera: oncorhyunchus, salmo or salvelinus. They live in freshwater, but some trout do spend time out in the ocean and return to freshwater to spawn, just like salmon, which trout are closely related to. Several common types of trout are brown trout, lake trout, rainbow trout and steelhead. A trout’s diet usually consist of other fish and aquatic invertebrates. When a trout reaches over 12 inches they’ll usually only feed on smaller fish. Trout are a very popular game fish and many state wildlife agencies stock lakes, ponds and streams with trout for anglers to catch.

You can locate trout in lakes and streams with cool water. The ideal temperature range is 50 to 60 degrees. Juvenile trout can also be known as fry, troutlet and troutling. They tend to mature around 2 to 3 years of age. The lifespan on trout depends on the species. For example, a rainbow trout can live up to 7 years while lake trout can live for several decades. The color variation of trout varies greatly and is dependent on the type of trout you’re looking to catch. Trout are not only popular with anglers, they are also popular on the dinner table. Trout, along with its close relatively salmon are a common staple in many American’s diets.


What To Use When Trout Fishing

Since rainbow trout grow to about 12 inches, you are safe even with ultralight tackle. A standard trout fishing rig would include a spinning reel, 4-8 lb test flurocarbon line and a light or ultralight action rod.

There are two big rules to remember when trout fishing: 1. Powerbait will only work on stocked trout (most likely), and 2. Most trout over a foot long cut flies and insects out of their diet. These won’t make or break the bite, but they will affect the type of trout you hook into.

Powerbait (or trout marshmallows, or any dough bait substitute to imitate pellets) is simply not a good choice for natives. Stocked trout grow up in hatcheries and on farms where they are fed pellets. Dough baits like Powerbait are created solely to imitate those pellets in sight, texture, and scent. If you are fishing for natives, they likely have no idea what that glob of dough floating in front of them is. While you may get a bite out of curiosity, it is unlikely that they are conditioned to eat those pellets and will lay off your line.

If you’re looking for BIG trout (steelhead or larger adults of the bows, browns, and brooks), avoid fly, mayfly and tiny haired imitators. While they may snack on zooplankton, flies or other tiny insects occasionally, they almost exclusively eat smaller fish, worms, shrimp, and larger insects when they are over 1 foot in length. To imitate those common trout meals when trout fishing, here’s what you should throw.


Counting Down

Another mistake I notice a lot of anglers make is that they begin to reel in the spinner as soon as it hits the water. If the trout are feeding near the surface, you’ll be fine; but this is not always the case. If the trout are holding deeper in the water column, chances are it will be a very slow day.

The solution? Count your lure down. Depending on the shape and size of the spinner, a good rule is that it will sink one foot per second. After you make your cast, wait and count. This will give you an idea of how deep your lure is. I will usually reel in one cast on the surface, then let the next one sink down for two counts, then 4, 6, 8 counts and so on. Eventually, you will know where the bottom is. This will help you focus on the entire water column.

All right, and now for some advice that might sound silly at first. I count out loud. I don’t scream it, but loud enough so I can hear myself. Why, might you ask? Well if you catch a fish on an “8” count, wouldn’t it make sense to count down to eight again the next time? Of course! Sometimes though, in the heat of the battle with the trout, I will forget what number I was at. I find counting out loud helps me keep track of where I was. Maybe this won’t be an issue for you. Just thought I’d throw it out there.

So there you have it, between fan casting and counting down, your lure you will be covering much more of the water in front of you, and reaching more trout. You’re already on your way to being a much more effective spinner fisherman!


Other Rainbow Trout Tips

If I am fishing in a lake with which I am unfamiliar, I usually start at an end of the lake that has a stream flowing in or other moving water.  It seems those spots always cause fish to congregate.  I usually set up one rod with a floating worm, cast that out, put a strike indicator of some sort, put it in a rod holder and then fish around that spot with a Kastmaster or other lure for a while.  If I get no hits on either the worm or the lure in about 1/2 hour I go to another promising looking spot.  That approach seems to work pretty well all the places I have fished.  Of course, I’m always on the lookout for fish activity such as trout rising for insects or chasing baitfish on the surface, birds diving to pick off baitfish, etc.  If the water is very clear and I can see the fish I switch to the plastic jig in a natural color.  I put it in front of the fish I can see and see how they react to different types of twitches.  If I see a trout become interested in a certain retrieve, I will try that in other spots, even if the trout I could see does not ultimately eat.  Many times it is harder to catch the fish that you can see, especially in still water, because they can see you.

When fishing in a river I like to concentrate on slower moving pools and spots of slower moving water behind large rocks.  Trout don’t sit in the fastest part of the current; that would tire them out.  They wait in ambush in spots outside the current and dart out to eat things that float by.  Try to make your bait or lure float by in the same way that a stray bug or worm or fish might.  They have to make a split second decision on whether to eat it or not and are generally easier to catch than trout in lakes as a result.

read more
Fishing Tips

Striper Fish – Fishing Gear and Techniques

striper_fish

From Virginia to Maine, striped bass (Morone ­saxatilis) are often the center of every hardcore angler’s universe. Strong, hard-striking and gorgeous, with fleeting hues of pink and purple, the extraordinary bass is revered by sportsmen along the coast.

Yet most fishermen who spend more than a few days on the water each season acknowledge that the dynamics of striped bass fishing have changed considerably. Anglers saw shifts in striper size and abundance for well over a decade, with the latest science — a stock assessment released in 2014 — pretty clear in its conclusions: Numbers have diminished gradually but significantly since 2006.

As with most other bass, stripers will tend to stay closer to the surface during the fall and spring and then go deep during the hotter summer months. For those spring and fall months, you can have some success with top water lures such as poppers and minnow lures that suspend just below the surface. For those summer months, some deep diving crank baits will produce some nice keepers. Also, working some jigs or flashy Roadrunner lures will get get you results.


Striper Gear

The first thing you need for striper fishing is the proper gear. I prefer the Yozuri Pencil. This bait is designed to dart back and forth across the top in what is commonly referred to as “walking the dog”. The action of this bait is really what separates it from other “dog walking” style baits because it will maintain that desired side to side action whether you are working it slowly, or trying to burn it as fast as you can. It has incredibly sharp hooks, great sound, and you can cast it a mile.

The next thing you need is a long, stiff, fast action rod. You can use a flipping stick if you’re not able to have a rod designated solely for topwater fishing, but I recommend getting one for topwater plugs and frogs because you’ll want that intended design when it comes to this particular style of striper fishing. For the reel you want high speed, at least 7.3.


Striped Bass Fishing Techniques for Fooling Finicky Bass

Every year I hear of instances where schools of bass refused to hit anything thrown at them. I’ve had my share of disappointing outings, however, over the years, I’ve honed a few techniques that often convert that frustration into success.

On most occasions, when stripers are being extremely finicky, their feeding activity is taking place right near the surface. In addition, the water is usually either very clear or very off-colored, and baitfish schools are nearby. Under these conditions, my observations suggest that the fish are either seeing too much of a lure, or not enough of it.


Have a Need for Speed

Have you ever had a striper smack your plug as you hurriedly reeled in the last ten yards of your retrieve to make another cast? Or has a bass continually boiled, bumped, or rolled behind your offering without grabbing it? Often times these things occur when the water is crystal clear and the surf is fairly calm. Under these conditions, a simple increase in retrieve speed may be all that is needed to trigger a solid strike. One outing, almost 25 years ago, gave me some insight into the effectiveness of speed. During that last week in September, false albacore consistently invaded the surf, and once a school of these speedsters were within casting range, all fishermen on the scene would start throwing metal or small Polaris-style poppers. The trick was to retrieve these lures as fast as possible. As a school pushed past me, I finally had an albie – or so I thought – explode on my popper.


Work the White Water

When stripers are being finicky about taking an artificial lure in clear water, and there is white-water created by breaking waves nearby, use it to your advantage. I’ve been lucky enough to catch fish, at times, along a crowded beach of empty-handed fisherman because I recognized that the bass would only take a plug in the limited white water available. Precisely timing my casts with the breaking waves and having the lure work on the back edge of the wash was the ticket.


Do Nothing

Many years ago, after a successful fishing trip to Canada, I was confronted with a very problematic school of bass back home. Acres of stripers were slurping baitfish off the surface all around me in the dark, yet my plug came through the school without so much as a bump. I had a similar encounter with finicky walleyes in Canada a few weeks earlier, and wondered if the technique that helped me connect with the north-of-the-border walleye would work on these hometown stripers.


Get Creative with Colors

Certain color patterns perform better under specific conditions when feeding stripers are reluctant to strike. In crystal-clear, calm-water conditions, I’ve had my best results using the most natural and subtle color patterns. Patterns and lures imitating the prevailing baitfish are the first to come out of my plug bag. With advances in modern manufacturing technology, some lures look almost life-like. Under cloudy-water conditions, I opt first for higher visibility patterns in yellow, yellow and black, red and yellow, or all black. Here, I want to choose an offering that will stand out the most in a murky environment.


Own the Night

Sometimes, when stripers are active toward late afternoon but are rejecting artificial offerings, a little patience can go a long way. Often, after most anglers have given up and gone home, the few that stick it out another hour into darkness are rewarded with the best bite of the day. The cover of darkness often turns nippers into strikers.


Get Down and Dirty

Although I am rather stubborn about abandoning artificial lures under most circumstances, the fact remains there will be times when quality stripers will only respond to the real thing. This is especially true when schools of bunker are being followed by big striped bass. At this time, a snagged bunker will often be the only offering that will take a good fish. The same can be true with clams, bloodworms, cut baitfish, and other live or fresh baits.

Be a Tease

When stripers are in their lure-rejection mode, there are a few reliable tactics that always seem to save the day for me during the season. One tactic that has worked for generations of fishermen is the use of a teaser in front of the main lure offering. These little wisps of feather, bucktail, flash and plastic, or a combination of all, account for thousands of finicky bass each year. Bass often crush these tiny morsels with reckless abandonment, while ignoring a more substantial target. Although I primarily fish without using a teaser during the season, because they cuts down on casting distance, I always carry a few in my bag for special situations. These are a few techniques that have worked for me and other fishermen over the years.

read more
Fishing Tips

Tiger Musky Fish – Fishing Tips and Equipment

musky_fish

Muskie (Esox masquinongy) are a large species of freshwater fish that are native to North America. Muskie is just a nickname for this species of fish, the true name is muskellunge. In the pike family muskie are the largest member and they are actually a very uncommon fish. They are only found in large rivers, mesotrphic lakes and oligotrophic lakes in North America. Muskie will hunt and feed on prey that is up to 30% of its body length and this can include fish crayfish, frogs, ducklings, muskrats, mice snakes and other small birds or mammals. In the spring months they will prey on generally small prey while in the fall they will hunt larger prey to prepare for the winter months.


Where to Fish

New River

The lower New River in southwest Virginia and West Virginia is the best option for musky in the area. The state record musky was pulled out of these waters in 2007.


James River

The upper James River above Lynchburg is not quite a big a river as the New, but is rapidly gaining a reputation as a musky fishery of equal production.


Shenandoah River

The VDGIF stocks both forks and the main channel of the Shenandoah, adding an intimidating predator lurking just under the surface of one of the East’s most beautiful rivers.


Cave Run Lake

The “Musky Capital of the South” is located just east of Lexington, Ky. and is famous for its large fish and consistent feeding action. The 54-inch state record was caught here in 2008, but you can also fish the tailwaters.


Melton Hill Lake

Part of the Clinch River system in Tennessee, Melton Hill Lake is nearly 5,500 acres of prime predator habitat. The tailwaters are another great option, and a 50-inch limit is a testament to the behemoths that lurk there.


Equipment

First-and-foremost, know that musky fishing is not a cheap hobby (or addiction). The high prices of baits, rods, reels, line, etc. may steer many new musky anglers to buy the cheaper musky gear. Take my advice from someone who has “been there, done that”. It will be much cheaper in the long run to make the initial investment to buy quality gear. Outlined below are my recommendations and necessities for musky fishing.

Release Tools – Catch and release of every musky is critical in order to keep this sport alive. Having the correct, quality release tools should be the first thing any musky angler buys. ALWAYS CATCH AND RELEASE.

  • High leverage bolt/ hook cutters
  • Needle-nose pliers
  • Musky-sized jaw spreader
  • Mike Hulbert’s Musky Release gloves
  • Muskie Bumper – 60” Fatboy Muskie Bumper
  • Frabill 40” X 44” Power Catch “Big Kahunna” Net – A net of this size is used to as an “in-lake” live well. It’s important that you keep the musky in the net while unhooking it, taking it out of the water only briefly for a short picture.


Musky Fishing Baits

There are thousands of musky baits to choose from, ranging from small spoons to two pound soft plastic baits. If you are new to the musky fishing world, knowing where to start can be extremely difficult. This section of the article outlines what I consider “must-have baits” for the any musky angler. Every bait has a time and place for different times of the year and conditions.

The “Figure 8” – Quite possibly the most abstract concept to most new musky anglers, the “figure 8.” Muskies, being at the top of the food chain in most waters they inhabit, have little to nothing to fear. This makes them curious and meticulous by nature, which results in very abstract feeding habits. Muskies will often follow a potential meal before even considering actually eating it, your bait included. So, how do you coax a following musky into eating your bait? The figure 8. Think of a boat side figure 8 as an extension of your cast. As you’re reeling in your bait and it gets close to the boat, whether you see a fish behind it or not, start speeding up the retrieval speed. You never want to reel slower when going into the figure 8. Put your rod tip into the water and make wide sweeping “figure 8” motions with little (about 2 feet) line out. Wide turns are key to successful figure 8’s. It is very hard for a 48-inch musky to follow your bait if the arc lengths of your turns are only 30 inches. If a musky is following boat side and is right behind the bait, in-and-out of every turn and speed up your figure 8. Oppositely, if a following musky is very lethargic and seems uninterested, slow down your figure 8 in hopes that it will seem to be an easier target. Every cast, no matter what bait used, ends with a proper figure 8.

read more
FishingFishing Tips

Fishing Hook Sizes – Fishing Hook Knots – How to Tie A Fishing Hook

fishing_hook

A novice fisherman will hit the water armed only with the knowledge of an overhand knot. A real angler wouldn’t dare venture out with such a limited arsenal.

Different situations call for different knots. The knots needed for tying fishing line to a hook are different from the knots needed to join two sections of line together.

To be prepared for anything, learn these knots before you hit the water.


Tying The Fisherman’s Knot

The real name of the Fisherman’s knot is the Improved Clinch knot. But way back when, many people called it the Fisherman’s knot because every angler knew how to tie it, and it was often the first knot they learned to attach a fishing line to a hook.

Knot-tying instructions use a few standard terms. These terms are pretty self-explanatory, but just to make sure the instructions are clear, here they are:

Tag end: The end of your line. This is the part that does the knot-tying.

Standing line: The rest of the line that runs up toward the reel.

Turn: Sometimes called a wrap. A turn occurs when you pass the tag end completely around the standing line.


To tie the Improved Clinch knot, a.k.a the Fisherman’s knot, follow these steps:

  1. Run the tag end of the line through the eye of the hook and pull 8–10 inches of line through the hook eye.
  2. Wrap the tag end around the standing end for five wraps or turns.
  3. Now pass the tag end through the loop next to the hook eye.
  4. You have formed another loop that includes your wraps.
  5. Pass the tag end through that loop.
  6. Wet the loops with some saliva to lubricate the knot.
  7. Hold the tag end and standing end in one hand and the bend of the hook in the other; then pull with steady pressure.
  8. If you are not sure about safely holding the hook, grip it firmly but not super firmly with needle-nose pliers.
  9. Tighten slowly.
  10. Clip the tag end so that only 1/8-inch is left.
  11. A standard fingernail clipper is a great tool for making a clean final cut on the tag end.

The Only 5 Fishing Knots You Will Ever Need To Know

Here are the top most-used fishing knots you should start out learning.

Every angler needs a few things to be successful: a good fishing rod and lure combination, a great location, and the ability to tie a few simple but pivotal fishing line knots.


The Palomar Knot

If you learn to tie a particular knot – especially if you fish with a braided line of any kind – make it the Palomar knot. Regarded by anglers as one of the strongest knots, the Palomar serves a similar function to the improved clinch knot, securing a hook or swivel to one end of your fishing line, or fastening a fly to a leader.


The Blood Knot

Unlike the improved clinch knot and the Palomar knot, a blood knot is not used to fasten fishing line to hooks or lures, but is instead utilized for tying two pieces of fishing line together. Used often fly fishing or for making use of broken or odd length fishing lines, the blood knot is an easy-to-learn and valuable skill to have on any fishing boat.


The Improved Clinch Knot

Chances are, if you’ve been fishing for more than about a week, you know how to tie an improved clinch knot. It’s one of the most important knots in all of fishing, used by most anglers to secure their hooks, lures, or swivels to the fishing line.


The Surgeon’s Knot

Like the blood knot, the surgeon’s knot comes in handy when you need to attach two different pieces of fishing line. Unlike the blood knot, the surgeon’s knot is optimal for fastening together two fishing lines of different diameters.


The Spider Hitch Knot

Used to boost the strength of a fisherman’s line, the spider hitch knot is a lesser-known, but no less useful knot to have in your arsenal. By forming a double line, the spider knot is able to take on heavier hooks or leaders.

read more
There's A Newsletter For Everyone!
Enter your name & email address, and start getting the best of 3hack.net in your inbox!
ENTER YOUR NAME
ENTER YOUR E-MAIL